
HardieBacker vs Wonderboard: Which Backer Board Is Best for Your Project?
Having the right backer board for your tile installation project is essential since, in order to make a flawless tile setting, you will need a substrate that will help prevent moisture damage, mold growth, flooding, and warping. Two of the most chosen brands in the market are HardieBacker vs Wonderboard.
This article will take a comprehensive look at the differences between Hardiebacker vs Wonderboard, and help you choose the perfect backer board for your installation.
Here’s a similar article on Hardiebacker vs Durock.
What is Backer Board?
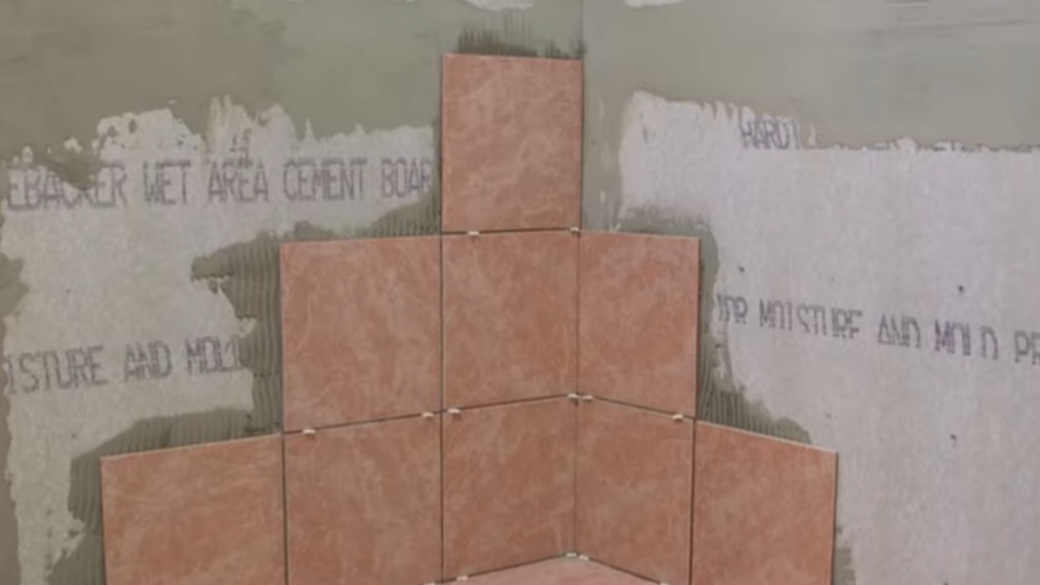
Backer board is a material used in tile installation that provides a flat and stable surface. The backer board is constructed from cement, water, silica, flour from limestone, and strengthening fibers like fiberglass. Unlike drywall, which contains some wood, the concrete backer board lacks any organic material. As a result, it is less prone to rot, decay, or foster the spread of mold.
You can use the backer board for tile installation on the kitchen floor, bathroom floor, walls, shower stall, and more. It is strong, durable, and water-resistant, making it ideal for wet areas, such as kitchens and bathrooms.
What is Hardiebacker?
HardieBacker is a cement-based backer board created from a blend of Portland cement, ground sand, and cellulose fibers. Available in 3×5 and 4×8-foot sheets, it offers a range of thicknesses from 1/4 inch to 1/2 inch.
One of HardieBacker’s primary benefits is its durability. Its moisture resistance makes it ideal for use in areas with high humidity, such as bathrooms and kitchens. Additionally, its strength and load-bearing capacity makes it suitable for floor installations. However, cutting and installing HardieBacker can be challenging due to its substantial weight.
What is Wonderboard?
Custom Building Products manufactures Wonderboard, a cement-based support board. It is available in 1/4-inch and 1/2-inch thicknesses and is composed of a combination of cement and fiberglass mesh. Wonderboard is well-known for its usability and is a popular option among DIY projects.
This board is ideal for interior and exterior substrate settings due to its high-quality structure, strength, and moisture resistance features.
Which Backer Board Should You Choose?
Choosing between the best backer board brand may be a bit confusing, and here are some factors that you need to consider when selecting a backer board:
Structure
While HardieBacker and Wonderboard provide a sturdy foundation for tile installation, HardieBacker’s composition makes it denser and more resilient than Wonderboard. As a result, HardieBacker is the superior option for a backer board capable of enduring substantial foot traffic and forceful impacts.
Resistance
Even though Hardiebacker and Wonderboard are both moisture-resistant and can prevent mold and mildew, HardieBacker is more effective since it’s water-resistant, especially for installing tile in wet areas like bathrooms, swimming pools, and shower stalls.
Price
Considering the price for backer boards, HardieBacker is more expensive than Wonderboard since the materials used for HardieBacker are of higher quality. The cost of HardieBacker, however, is not a concern if you’re looking for a backer board that is more resilient and long-lasting.
Ease of Installation
While both HardieBacker and Wonderboard offer straightforward installation, Wonderboard proves to be lighter and more user-friendly than HardieBacker. Its ease of use makes it an ideal choice for uncomplicated DIY projects.
HardieBacker vs Wonderboard for Specific Jobs – Which Is Best?
HardieBacker and Wonderboard are excellent materials for wet areas like bathrooms and kitchens because they can endure high humidity and moist conditions. Despite their resemblance, Wonderboard and HardieBacker are not the same backer boards, with HardieBacker having greater longevity and the ability to carry heavier weights.
1. Shower Stalls and Walls
Because of its increased water resistance, HardieBacker is a better material for shower stalls and walls. Wonderboard can work well for tiny shower stalls or shower walls.
2. Fireplace Surrounds
HardieBacker and Wonderboard can both be used to make fireplace frames. But Wonderboard can’t handle the heat, unlike the HardieBacker.
3. Countertops
HardieBacker is the better choice for countertops due to its strength and durability. Wonderboard may not be strong enough to support heavy countertop materials.
4. Backsplashes
HardieBacker and Wonderboard are suitable for areas with backsplashes since they are both moisture-resistant. However, Wonderboard is a better choice for easily install a backer board.
5. Outdoor Patios and Decks
HardieBacker is the better choice for outdoor patios and decks because it isn’t damaged by water and weather. Wonderboard might not be suitable for use outside.
6. Swimming Pools and Hot Tubs
HardieBacker is the better choice for pools and hot tubs because it can handle water better than alternatives. Wonderboard might not be able to handle being in the water all the time.
7. Commercial Kitchens and Restaurants
HardieBacker is better for commercial kitchens and restaurants because it is strong, lasts a long time, and doesn’t absorb water. Wonderboard might not be able to handle a lot of traffic and be used in a business setting.
8. Hospitals and Healthcare Facilities
Because it prevents water or mold growth, HardieBacker is a better choice for hospitals and other healthcare centers. Wonderboard might not be able to stop germs from growing as well as it should.
9. Schools and Public Buildings
HardieBacker is better for schools and public buildings because it is strong, lasts a long time, and doesn’t get wet. Wonderboard might not be able to handle a lot of people using it in public places.
HardieBacker vs Wonderboard – Is There a Clear Winner?
Both HardieBacker and Wonderboard have pros and cons, so it’s hard to say which is better. It’s essential to consider your project needs and choose the best backer board that fits them. However, Hardiebacker is better for most scenarios.
Backer Board Installation Tips and Tricks
Installing the backer board is a very important step in putting up tiles. Follow these installation tips and tricks to ensure your tile installation project succeeds.
1. Properly Prepare the Surface
Before setting up the backer board, thoroughly preparing the surface is essential. Begin by eliminating any lingering adhesive, paint, or debris using a scraper or wire brush. The surface must be clean and devoid of dust or grease. A vacuum or damp cloth can be employed to cleanse the surface.
It’s also vital to ensure the surface is level and secure. In the case of any high or low spots, apply a leveling compound to balance the surface. This guarantees that the backer board fits snugly against the surface.
2. Choose the Right Backer Board for Your Project
Determine which type of backer board will serve your purposes best. Consider the build quality, longevity, cost, and how easily it can be installed. You can always use this guide to figure these things out.
3. Use the Right Tools
Choose and use the right tools to properly install tiles and backer boards for your installation project. Here are some examples:
● Circular Saw or Carbide-Tipped Scoring Knife
For cutting the backer board, you will need a circular saw or a scoring knife with a carbide-tipped blade. You should use a circular saw for big cuts, and for small cuts, you should use a scoring knife.
● Jigsaw
A jigsaw is a tool for cutting intricate shapes out of backer board.
● Drill
A drill is needed when installing fasteners.
● Trowel
A trowel is required when working with thin-set mortar.
● Dust Mask and Eye Protection
When cutting the backer board, wear a dust mask and eye protection to avoid dust.
4. Cut the Backer Board Carefully
When cutting the backer board, you have to be careful not to make dust. Wear a dust mask and glasses to protect your eyes when cutting the backer board. You can use a circular saw or a scoring knife with a carbide tip to make the cuts. For cutting curves or forms in the backer board, it is best to use a jigsaw. Make sure to cut the backer board outside or somewhere with good air circulation.
5. Apply Thin-Set Mortar Evenly
To make sure the backer board and tile stick well together, thin-set mortar needs to be spread out evenly. Use a pointed trowel to put the mortar on the surface and spread it evenly. Make sure to work in small areas so the mortar doesn’t dry out before putting the tiles in place.
6. Use the Right Fasteners
To keep the backer board in place, it’s important to use the right fasteners. To connect the backer board to the surface, use screws or nails that won’t rust. Make sure to put the fasteners at least 8 inches apart along the sides of the backer board and 12 inches apart in the middle.
7. Leave Space Between Backer Boards
It’s important to leave a small space between the backing boards to allow movement. Use spacers or shims made of plastic to make a gap between the backer boards of at least 1/8 inch. This will help keep the grout or tiles from getting cracked.
Final Words on HardieBacker vs Wonderboard
To wrap it up, whether you should use HardieBacker or Wonderboard for your tile installation job depends on what your project needs. Both backer boards have pros and cons, and it’s essential to think about structure, durability, price, and how easy it is to install.
HardieBacker is denser, lasts longer, and doesn’t get wet as easily as Wonderboard. This makes it a better choice for places with a lot of foot traffic and areas that get wet. Wonderboard is lighter and easier to work with, so it’s a good choice for people who do their own projects. No matter your choice, the backer board must be positioned correctly for your tile installation job to go well.
When you’re ready to decide the type of edging you want for your tiles, read our Bullnose or Schluter article.