airtable_6a42a052b4dc6-1

Ways to Transform Your New Apartment into a Homely Environment

Moving into a new apartment goes beyond simply opening boxes. Regardless of how all of your items have been unpacked and placed in the right spots, your place will continue to feel alien, a little too quiet, or not quite yours. But why? It all comes down to a number of issues, namely the lack of warmth, furniture that does not fit well into the space, and rooms that need some personalisation.

Don’t worry though – no fancy remodelling or buying new furniture is needed. Most of it depends on the smaller decisions that you will make over time.

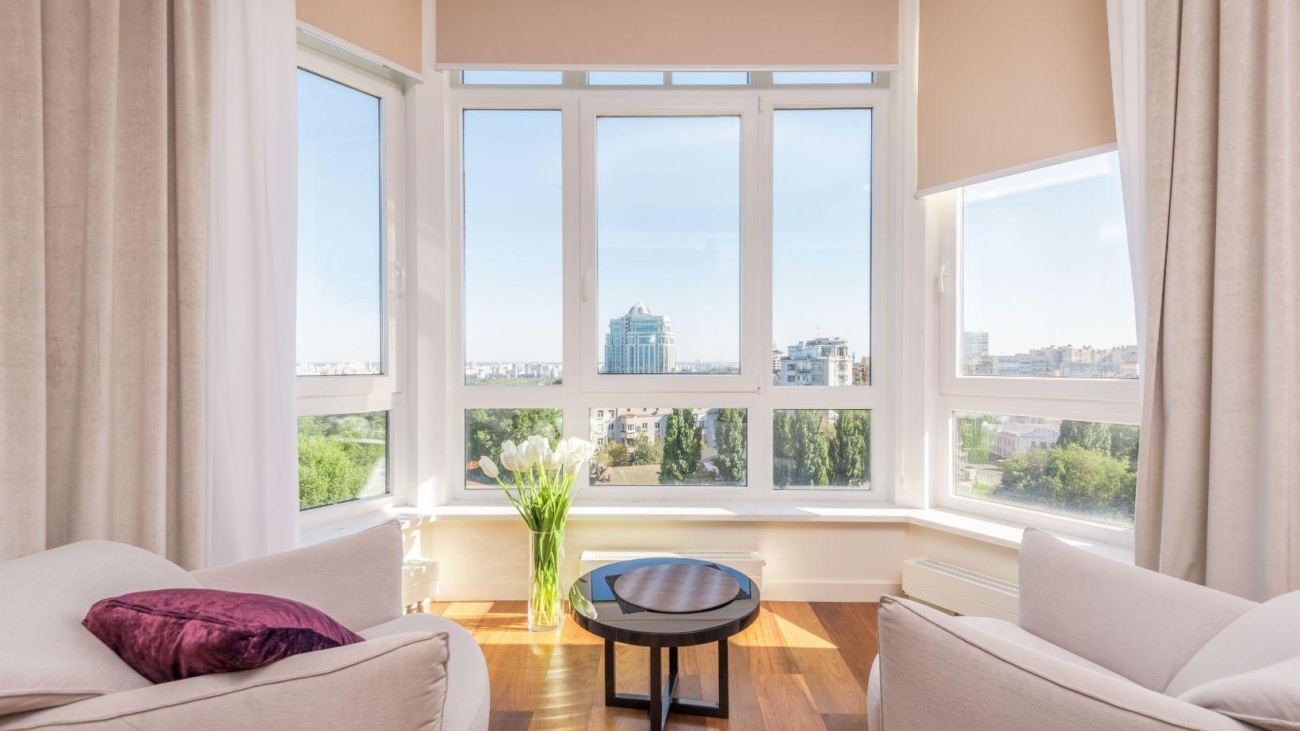
Understanding the Blank Canvas a New Apartment Offers

Purpose-built apartments are intended to be attractive for everyone; that is why they usually have the neutral look. White walls, uniform textures and lack of distinctive features are good from the point of view of renting, but they are also helpful – they give you an opportunity to start from scratch without any obstacles.

The thing is to fill your apartment with things gradually. Adding textures, colours, light and things that will make you feel at home – all this turns an empty place into a place where you can actually live.

Start from What You Already Have

In general, our natural response when we move into a new home is to start from scratch. It usually turns out that we end up buying unnecessary things while the useful pieces remain unused in the basement.

Familiar things have certain importance in a new environment. The old lamp that accompanied us for years, the piece of art that we moved twice before and the soft throw blanket: all these things bring continuity that is missing in the new things. A comfortable atmosphere comes gradually, and our things can help with it.

Let your existing pieces become the base and build around them.

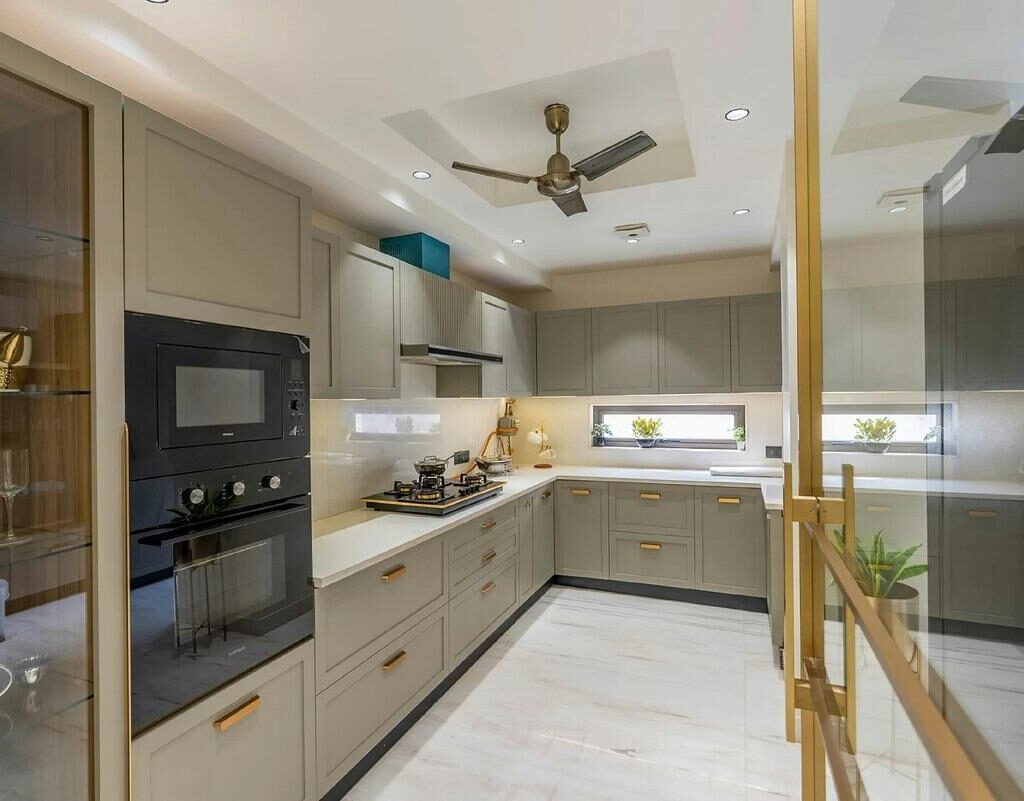
Choose Your Furniture According to Its Scale, Not Only Style

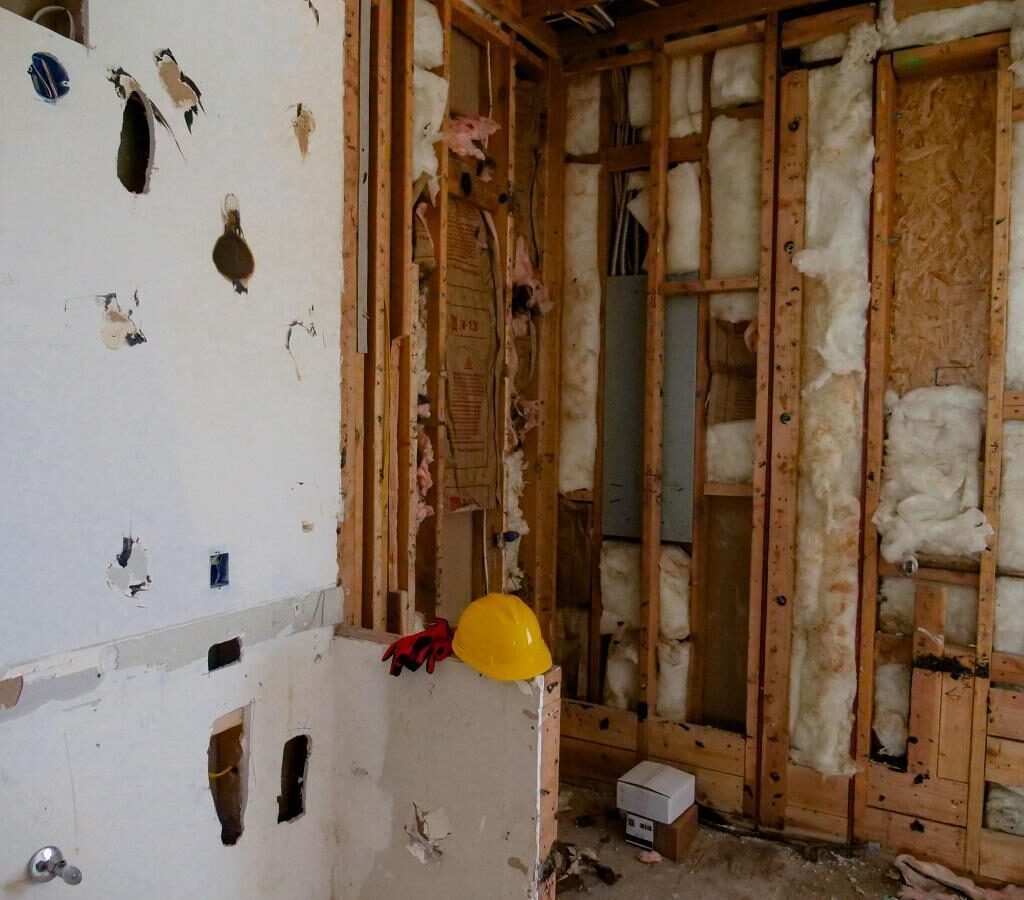
Furniture scale is one of the least considered details when styling an apartment. A piece of furniture that works well in a spacious home may appear too big in a small-sized room. The furniture frame that appears to be perfect in a photo from the Sydney furniture store could take up too much space in a low-clearance room.

Before purchasing anything significant, measure every wall, doorway, and clearance point in your apartment. For larger pieces, visiting a Sydney Showroom in person lets you assess actual dimensions, upholstery texture, and how a piece occupies three-dimensional space, none of which translates accurately through a screen.

What Should Be Considered Before Purchasing Any Furniture

  • Height of the floor to the ceiling in relation to any shelving that might be installed
  • Clearances for traffic around beds, sofas, and dining tables
  • The impact of natural light direction on the finish and colour of any furniture
  • Whether the item must fulfil multiple roles in a small space
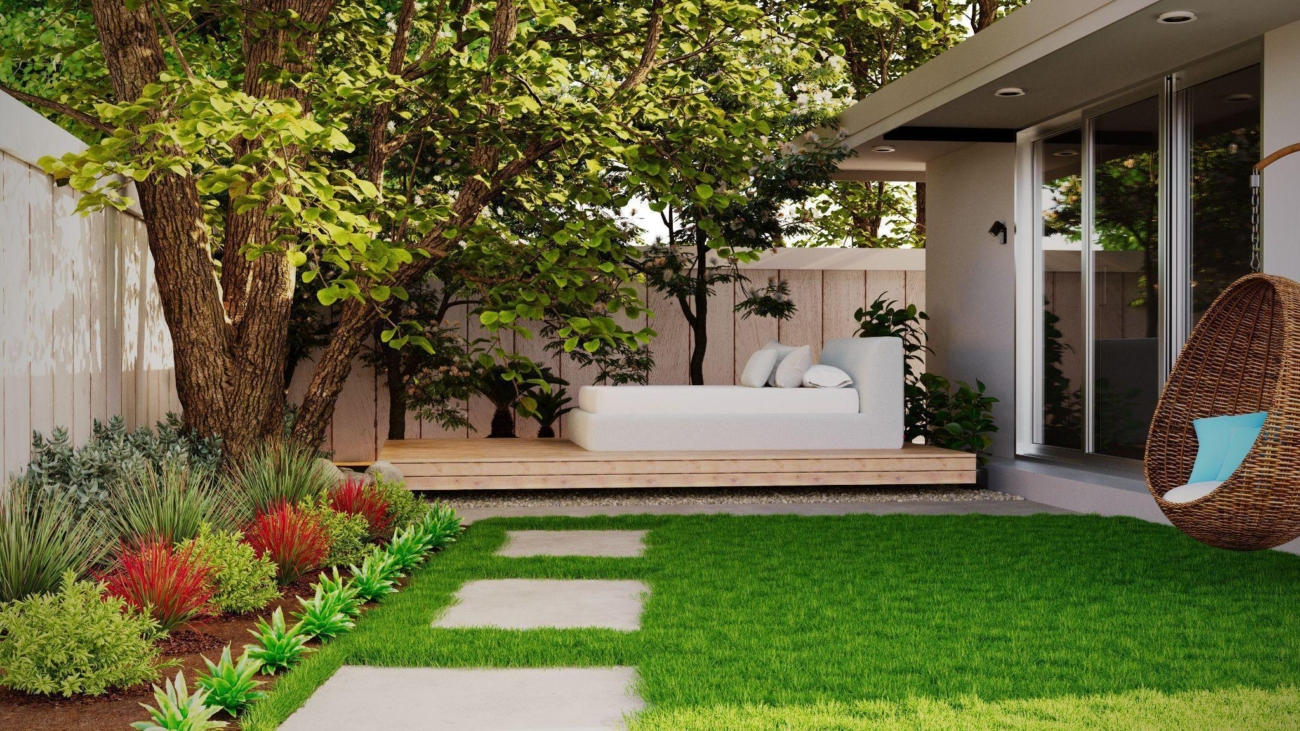
  • Use Layering to Add Warmth Without Permanent Changes

    There is an important constraint for rented apartments: painting, making any constructional modifications, and adding fixtures that cannot be taken away are impossible. However, this is a great way to get inspired to use layering, which is the best way to style your place regardless of its size and budget.

    By layering, we mean the combination of various textures, lighting, and surfaces, which creates an illusion of depth. A rug anchors your living space and makes it more comfortable acoustically. Floor and table lamps create spots of warm light that ceiling lights do not provide. Pillows and blankets add softness without any commitments.

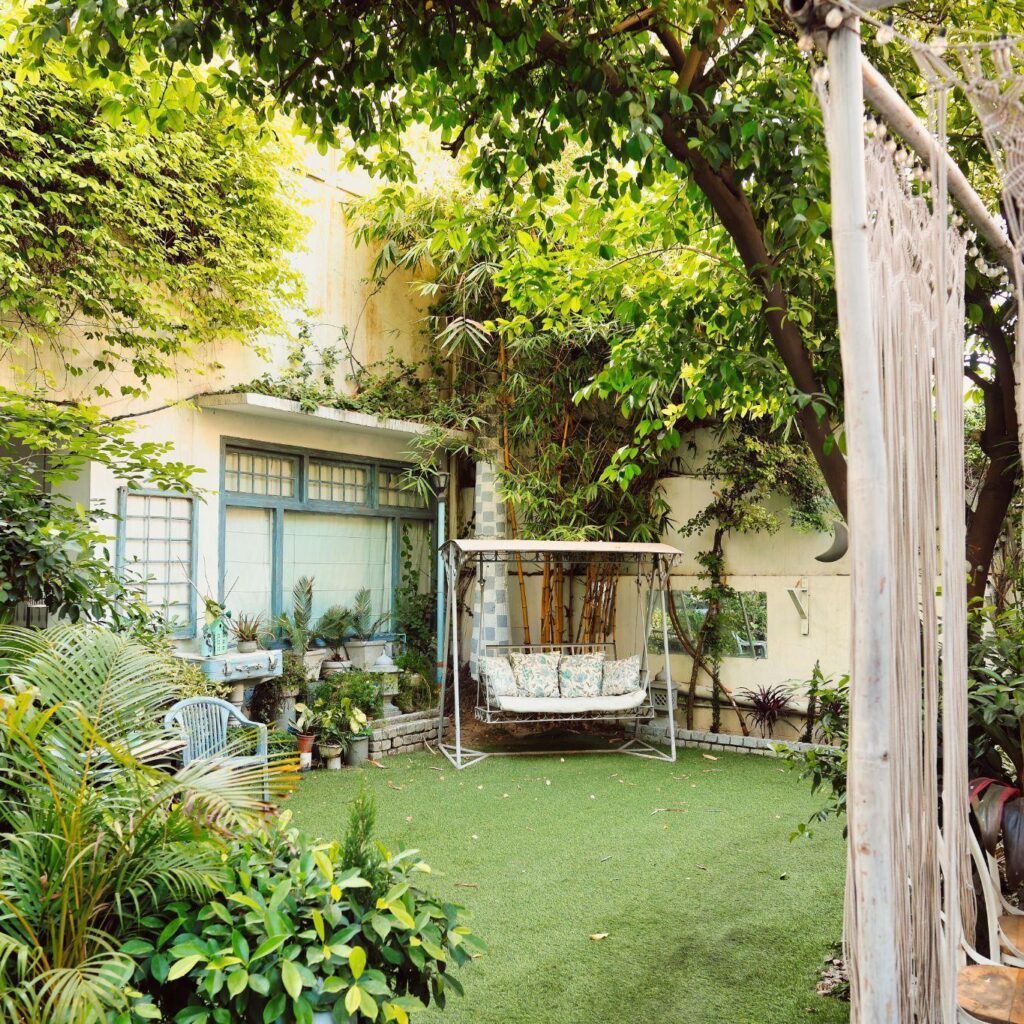
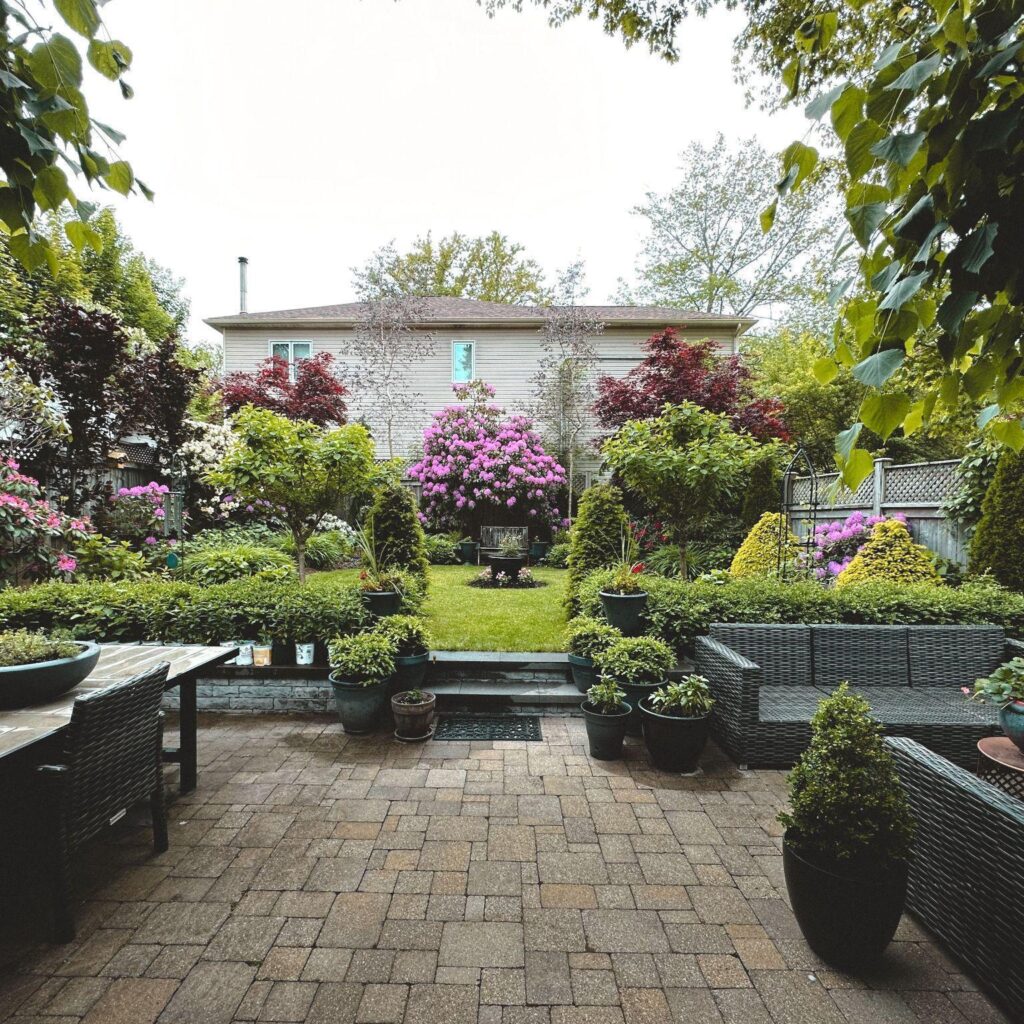
    Indoor plants deserve separate consideration. There are a lot of varieties that will feel good in your apartment and have a great effect on your interior and air.

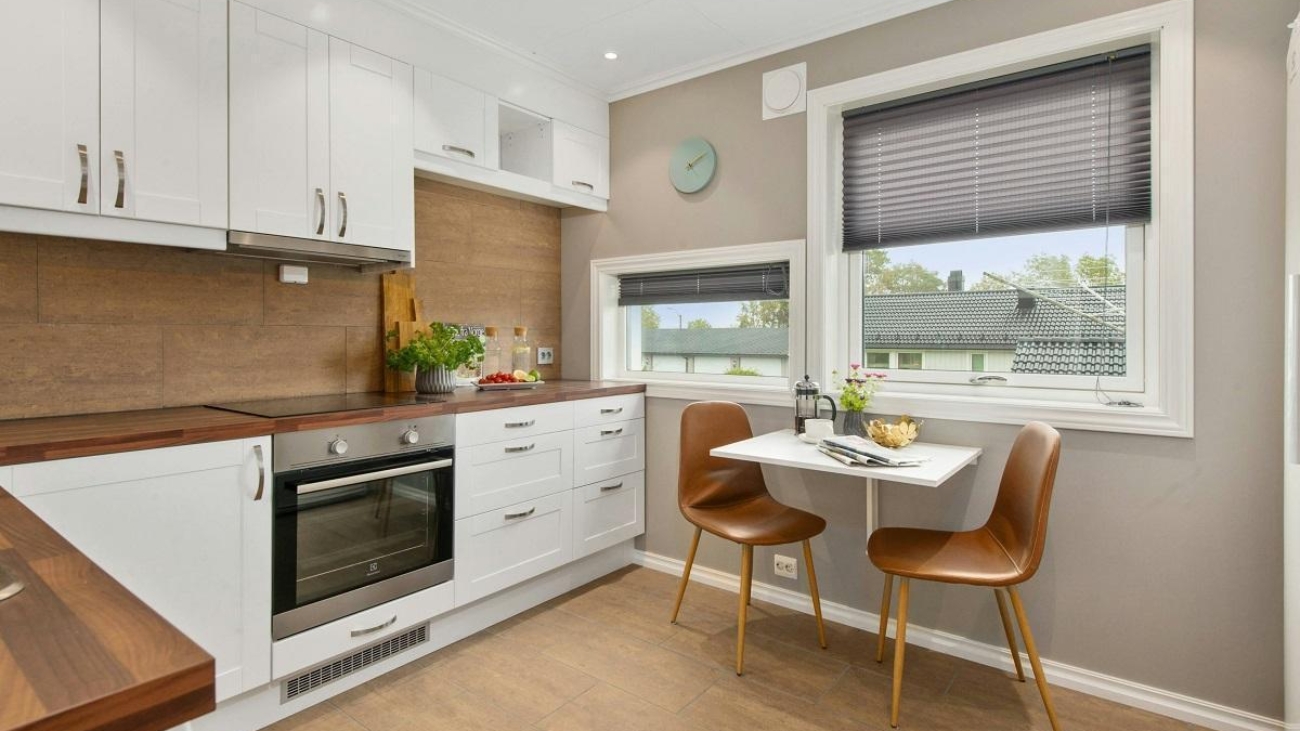
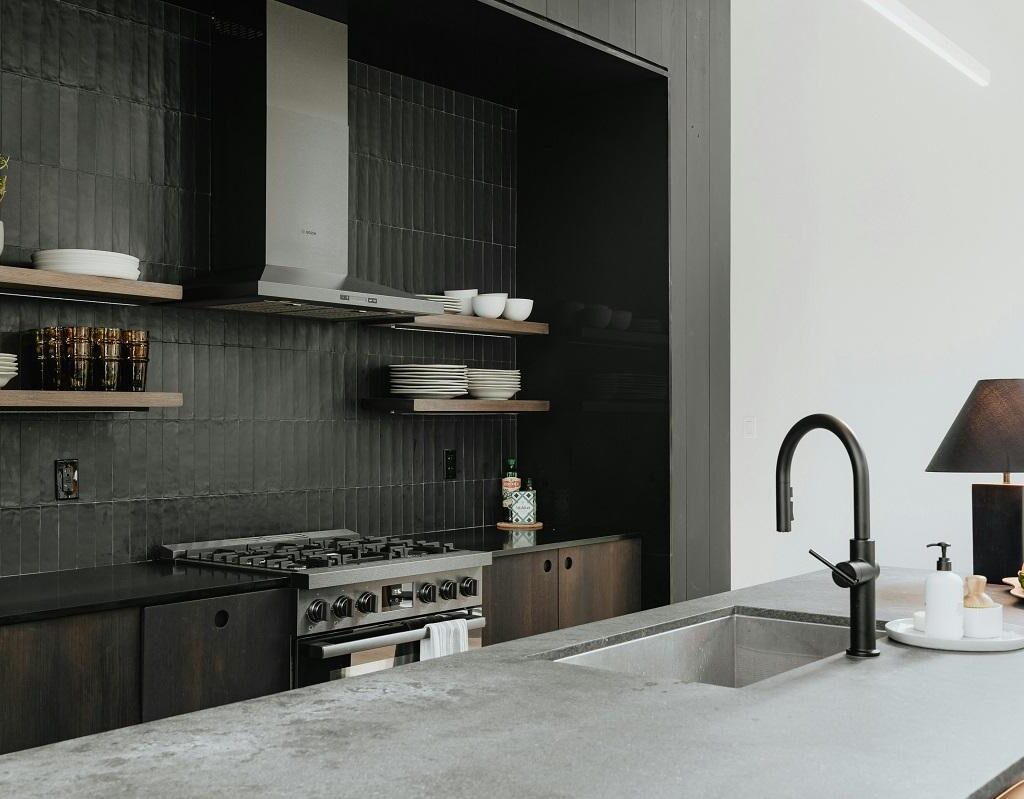
    Don’t Forget About the Kitchen and Bathroom

    Both of these rooms often get the least amount of love when it comes to apartment decorating, which is unfortunate since they’re the two rooms where a few adjustments can really help to create a sense of comfort.

    The kitchen should be neat and tidy, with matching containers for dry food products, an uncluttered counter, and a couple of plants.

    The bathroom requires a bit more effort – you need to swap simple metal shelving with something made of wood or ceramics, add some moisture-loving plants and choose good-quality towels. You don’t need to mimic the luxury style here – it’s enough just to decorate these rooms thoughtfully.

    Take into Account the Factor of Location on Your Comfort

    Interior decorating is important, but it doesn’t work alone. The neighbourhood you choose affects your everyday activities, your sense of social interaction and comfort coming back home each evening.

    If you have decided on choosing a long term apartment rental in Sydney, think about the location of your choice because it may influence your sense of belonging there more strongly than good interior design does.

    The Questions to Ask Yourself When Choosing the Apartment

  • Does the apartment get enough natural light during the day?
  • Is the level of ambient noise bearable for your activities?
  • Are the services you use close by?
  • Does the building look well cared-for and responsibly managed?
  • Home is Created Slowly

    A new apartment will not become home all of a sudden. Rather, the feeling develops slowly as the result of various minor choices, such as finding the right position for a lamp and making sure the light works or purchasing a rug that gives character to the living room or the corner that you start to spend time in.

    Do things patiently and calmly and avoid being in a hurry. Focus more on comfort rather than on aesthetics for several weeks and do not be afraid to change something as you discover how you really use the space.

    airtable_6a42a0453890f-1

    How to Choose the Right Real Estate Agent When Buying a Home in a Competitive Market

    Navigating a fast-paced real estate market requires much more than just browsing online property listings and attending weekend open houses. If desirable properties are getting several competitive offers within days of they hitting the system, buyers are put under extreme pressure to make financial decisions in a split second. Choosing a professional’s representation can be a deciding factor in the home-buying process in a high-demand setting where bidding war and low supply is a regular occurrence. The right advocate won’t just simply present you with homes for sale; they actively present your offers to compete against some other intense marketplace. Understanding how to evaluate an industry professional ensures you secure your dream property smoothly without overpaying or taking on unnecessary transactional risks.

    Prioritizing Local Market Dominance and Transaction Volume

    In a very high competition environment, it is impossible to work with a part time agent or a generalist who has separate regions. You will need to hire a local expert with a thorough knowledge and understanding of neighborhood trends, nearby school districts, and changing property prices. Aligning yourself with the Best Real Estate Agent Fremont, California has to offer grants you an immediate competitive advantage through established regional credibility. For example, local industry leader Neena Pattar is a top-producing agent in the past year for both sales volume and transactions in Fremont, CA real estate. During a real-time home search, having a partner who views a lot of properties in the area guarantees that you’ll be kept ahead of the general home buyer throughout the process.

    Evaluating Advanced Negotiation Certifications and Proven Strategies

    In a hot seller’s market, victory isn’t simply a matter of offering the most money. The key to a successful transaction is that your agent is able to put together an attractive contract with terms that will resonate with a seller’s particular needs. When starting to interview agents, ask what their strategy is in competitive bidding situations and what contingencies are important to them. Choosing a certified negotiation expert ensures your advocate knows how to handle delicate counteroffers and handle strict appraisal gaps with absolute precision. A pro at negotiation is going to be polite throughout the negotiation process and will be able to stand up for your money while making your purchase contract very appealing to the listing agent.

    Securing Access to Off-Market Properties and Professional Networks

    In highly sought-after residential neighborhoods, some of the best homes are bought and sold before they are ever published to the public Multiple Listing Service. Real estate experts have extensive local relationships and share exclusive pocket listings and upcoming inventory among their trusted real estate associates behind the scenes. A savvy, trusted neighborhood real estate agent can tap into the local market, where there are opportunities that consumers don’t see on the www.A local agent with a solid reputation can use their network of professional contacts to find niche opportunities to general consumers. This inside access to the property gives you the opportunity to see your properties first and to make offers off market, and you no longer have to worry about bidding wars, as your family has a stress free route to home ownership.

    Demanding Transparent Communication and Lifelong Support

    In a complex property transaction, there are many moving parts, such as tight deadlines of exchange, property inspections, loan approval, etc., and title searches. A seller may instantly turn down your offer if a text is not responsive or if they missed a detail on a contract. Find a real estate firm that values effective and clear communication and offers a personalized, hands-on approach. The ideal representative will take the time to explain each step of your operations, giving you a full understanding of the future consequences of your investment. The trust and care that comes from having a relationship firmly grounded in client care will give you complete peace of mind from your first consultation, through closing and beyond.

    Conclusion

    Succeeding in a highly competitive real estate market demands a careful, strategic approach to choosing your professional representation. You hire the best producers in your area who have a solid understanding of your community and know how to negotiate like a pro to avoid transactional uncertainty. An advocate who has a large network of his contacts can help you in finding the hidden property which is not on the market and there is no risk of entering in a bad deal if you can communicate with him. One of the biggest financial events of your life is buying your home and you need the expert guidance. Take the time to evaluate local trade records carefully today to find a trusted partner who can transform your real estate goals into reality.

    airtable_6a3d09166987e-1

    The Rise of Construction Documentation in Washington’s Growing Real Estate Market

    Washington State continues to experience significant growth in both residential and commercial development. From mixed-use communities and apartment complexes to infrastructure improvements and commercial buildings, construction activity remains a major part of the region’s economic landscape.

    Cities such as Seattle, Bellevue, Redmond, Kirkland, and Everett have seen ongoing investment in new developments designed to accommodate population growth, business expansion, and changing community needs.

    As projects become larger and more complex, developers, contractors, investors, and property owners are placing greater importance on construction documentation. What was once considered a supplementary process has become an essential part of modern project management and communication.

    Today, photography, videography, drone imagery, and visual progress tracking are helping stakeholders maintain transparency, monitor project development, and create valuable records throughout the construction lifecycle.

    As documentation practices continue to evolve, companies such as Peak3 Visuals have demonstrated how photography, videography, and aerial imagery can support construction progress tracking and stakeholder communication. Industry professionals interested in these approaches can also review construction documentation insights to better understand how visual records support modern development projects.

    Why Construction Documentation Matters

    Construction projects involve numerous stakeholders. Developers, contractors, architects, engineers, investors, lenders, and local agencies often require regular updates throughout the life of a project.

    While schedules, reports, and site meetings remain important, visual documentation provides an additional layer of transparency that is often easier to understand.

    Photographs and video updates create clear records of site conditions, construction milestones, material installations, and project progress. These records help ensure that stakeholders remain informed and can review developments without always needing to be physically present on-site.

    As development timelines continue to extend over months or even years, maintaining organized visual records has become increasingly valuable.

    Supporting Better Project Communication

    Effective communication is critical to successful project delivery.

    Construction documentation provides a shared visual reference that helps align project teams and stakeholders.

    Rather than relying exclusively on written reports, project managers can use photography and video to demonstrate progress, explain challenges, and provide updates that are accessible to both technical and non-technical audiences.

    This visual approach often improves understanding and helps reduce confusion between parties involved in the development process.

    For investors, lenders, and property owners, visual updates can provide greater confidence that projects are progressing according to expectations.

    The Growing Role of Drone Technology

    Drone photography has transformed the way construction projects are documented.

    Traditional site photography remains valuable, but aerial imagery provides perspectives that are difficult to achieve from the ground.

    Drones allow project teams to capture entire developments, monitor site activity, evaluate progress, and document surrounding conditions from a broader viewpoint.

    This perspective is particularly valuable for large-scale projects such as apartment communities, commercial developments, infrastructure improvements, and mixed-use properties.

    In growing markets like Seattle and Bellevue, where development sites are often located in dense urban environments, aerial documentation helps stakeholders better understand both project progress and neighborhood context.

    Creating Long-Term Project Records

    Construction documentation serves purposes that extend well beyond active project management.

    Many organizations maintain visual records for future reference, historical documentation, marketing materials, investor communications, and portfolio development.

    A well-organized archive can help demonstrate how a project evolved from site preparation through completion.

    Years later, these records may still provide value when evaluating maintenance requirements, supporting future development efforts, or showcasing completed work to prospective clients.

    The ability to preserve a project’s history has become an important benefit of comprehensive documentation programs.

    Improving Accountability and Transparency

    Transparency has become an increasingly important topic within the construction and real estate industries.

    Stakeholders often expect greater visibility into project timelines, milestones, and decision-making processes.

    Construction documentation supports transparency by providing objective visual records that can be reviewed throughout the life of a project.

    Photographs, drone imagery, and video updates help verify progress and provide evidence of completed work.

    This can improve accountability while supporting stronger relationships between developers, contractors, investors, and property owners.

    Documentation Supports Real Estate Marketing

    Construction documentation is not only useful during development.

    Once projects are completed, visual assets often become valuable marketing resources.

    Developers frequently use construction photography, drone imagery, and progress videos to create case studies, showcase capabilities, and demonstrate project success.

    Real estate professionals can use these materials to communicate project quality and highlight the expertise involved in development efforts.

    As competition within the real estate industry continues to increase, having high-quality visual assets can strengthen future marketing initiatives.

    Washington’s Development Market Continues to Expand

    Washington’s population growth and economic activity continue to drive demand for new housing, commercial spaces, and infrastructure improvements.

    Seattle remains a major development hub, while Bellevue, Redmond, Kirkland, Everett, Lynnwood, and Tacoma continue to attract significant investment.

    With more projects entering planning and construction phases, the need for reliable documentation continues to grow.

    Developers increasingly recognize that visual records help support communication, project management, and long-term asset value.

    As a result, documentation is becoming a standard component of many development workflows rather than an optional service.

    Technology Is Shaping the Future

    Advancements in photography, drone systems, cloud storage, and digital asset management are making construction documentation more efficient and accessible.

    Project teams can now capture high-resolution imagery, monitor progress remotely, and organize visual assets through centralized platforms.

    These technologies help improve collaboration while ensuring that important project records remain accessible throughout the development lifecycle.

    As technology continues to evolve, documentation practices will likely become even more integrated into construction and real estate operations.

    Looking Ahead

    The construction industry continues to evolve alongside advances in technology, communication, and project management.

    Construction documentation has emerged as an important tool that supports transparency, accountability, collaboration, and long-term project success.

    Photography, videography, and drone imagery provide valuable perspectives that help stakeholders understand project progress and preserve detailed records of development activities.

    As Washington’s real estate market continues to grow, the importance of professional construction documentation is expected to increase.

    Organizations that invest in clear, consistent visual records will be better positioned to communicate progress, build trust with stakeholders, and preserve the story behind the projects that shape communities across the region.

    Peak3 Visuals is a Seattle-based commercial video production company serving Seattle, Bellevue, Redmond, Kirkland, Everett, Lynnwood, and Tacoma. The company works with developers, contractors, architects, and real estate professionals, providing commercial video production, drone photography, real estate media, and construction documentation services throughout Washington State.

    airtable_6a3ba0839e96a-1

    You Don’t Need to Tear It Down: Practical Retrofit Pathways to Net-Zero on a Budget

    Highlights:

    • Sequence matters: Always tighten the building envelope (air sealing, insulation) before investing in solar panels — otherwise you’re generating clean energy to heat the outdoors.
    • Incentives can cut costs significantly: In 2026, government rebates and tax credits can reduce total retrofit costs by $25,000–$40,000, making the project far more financially accessible than most homeowners assume.
    • Solar + storage now offers a 137% ROI on resale, while also slashing heating and cooling costs by up to 50% — and appraisers are formally recognizing energy savings in property valuations.
    • A staged approach beats waiting: You don’t need to fund everything at once. PACE financing and phased upgrades let you start compounding efficiency gains now rather than delaying until the budget is perfect.
    • Heat pumps are the electrification pivot point: Replacing gas heating with a cold-climate heat pump is what makes solar panels meaningful — without it, your home is still burning fossil fuels for its biggest energy draw.

    If you’ve been eyeing your energy bill with growing dread—or quietly wondering whether your 1970s ranch house could ever make it to net-zero—here’s the honest truth: it absolutely can, and you don’t need a blank check to get there. The path to a net-zero home isn’t just for new construction or homeowners with unlimited renovation budgets. It’s increasingly achievable through smart, staged retrofits that prioritize the right upgrades in the right order.

    The 2026 data is clear: costs are coming down, incentives are stacking up, and homeowners who approach this systematically are seeing returns that make the investment genuinely worthwhile. Let’s break down what the retrofit journey actually looks like, what the numbers say, and where you should start.

    Why 2026 Is Actually a Good Year to Start a Deep Energy Retrofit

    There’s a persistent myth that net-zero retrofitting is an all-or-nothing proposition—that you either spend $150,000 transforming your house into a passive-house showpiece, or you don’t bother. That thinking holds a lot of homeowners back unnecessarily.

    The reality is that the retrofit market has matured significantly. Contractor experience with heat pumps, air sealing, and solar integration has grown, which means installation quality is higher and fewer projects go sideways. Federal and state incentives have also made a meaningful dent in out-of-pocket costs for qualifying households. The window of opportunity is genuinely good right now, and the data backs that up.

    A full deep energy retrofit in Canada in 2026—covering insulation, triple-pane windows, a heat pump system, and solar panels—typically runs between $100,000 and $200,000 for a single-family home, but government incentives can reduce that total by anywhere from $25,000 to $40,000 depending on the province and program eligibility. That’s a significant offset, and it underscores why understanding the incentive landscape before you pick a contractor is so important.

    Even more compelling is the long-term picture. A net-zero renovation on a home built in the 1960s or 1980s can push resale value up by 15% to 25%, while also delivering direct annual energy savings of roughly $2,500 to $4,000 depending on region. Over a 15-to-20-year horizon, those numbers add up fast.

    Start with the Envelope, Not the Solar Panels

    Here’s where most DIY-oriented homeowners go wrong: they get excited about solar panels and skip the foundational work. Solar is glamorous. Air sealing is not. But if you install a photovoltaic system on a leaky, poorly insulated house, you’re generating clean energy to heat the outdoors. It’s an expensive mistake.

    The retrofit sequence matters enormously, and it starts with the building envelope—the walls, roof, floor assembly, windows, and doors that separate conditioned space from the outside world. This is the layer that determines how hard your mechanical systems have to work. Tighten it up first, and everything downstream gets cheaper and more efficient.

    Practically speaking, this means beginning with a professional energy audit. A certified energy advisor will use a blower-door test, thermal imaging, and consumption data to show you exactly where your house is bleeding energy. The results usually aren’t pretty, but they’re genuinely useful—you’ll get a prioritized list of measures ranked by cost-effectiveness.

    For most homes built before 1990, the audit will highlight attic insulation, basement rim joists, and penetrations around plumbing and electrical as the biggest opportunities. These are also often the most budget-friendly fixes. Air sealing a typical attic, for example, can cost as little as $1,500 to $3,000 in labor and materials, yet deliver energy reductions that rival much more expensive upgrades.

    The Windows-vs.-Insulation Trade-Off

    Triple-pane windows come up constantly in net-zero retrofit conversations, and they’re genuinely excellent—but they’re also expensive, often running $20,000 to $35,000 for a full house. Before you commit to that line item, it’s worth being honest about your existing windows.

    If your frames are solid and the seals are intact, adding interior window insulation film or exterior storm windows can capture a large fraction of the performance gain at a fraction of the cost. This isn’t a forever solution, but as a phased strategy while you save for a full window replacement, it’s entirely sensible.

    Insulation upgrades, by contrast, are almost always worth prioritizing early. Attic insulation, in particular, delivers a high return on investment because heat rises and attics are frequently under-insulated in older homes. Dense-pack cellulose or spray foam in the attic can meaningfully improve both your heating and cooling loads, reducing the size and cost of the heat pump system you’ll eventually need.

    Heat Pumps: The Pivot Point of Any Net-Zero Retrofit

    Once the envelope is solid, the conversation turns to heating and cooling. For net-zero, that almost always means replacing a gas furnace or old electric resistance system with a heat pump—either a ducted central system or a ductless mini-split configuration.

    Modern cold-climate heat pumps are a genuinely different animal from the equipment that gave heat pumps a bad reputation in northern markets twenty years ago. Today’s units operate efficiently well below 0°F, and they provide both heating and cooling from a single system. The electrification of your heating load is also what makes solar panels meaningful—without it, your home is still burning fossil fuels for its biggest energy draw.

    Heat pump costs vary widely by system type, home size, and climate, but a typical installed cost for a ducted system runs $15,000 to $25,000. Mini-split systems serving individual zones can be less, and they allow a phased approach: you can replace one zone at a time rather than the whole house at once.

    Before you finalize any HVAC decision, it’s worth understanding the full financial picture of what a net-zero home looks like from an investment standpoint—including the costs that don’t always make it into the headline estimates. The real financial story of net-zero homes in 2026, including frequently overlooked expenses and how to plan around them, is covered in detail in the linked piece, and it’s required reading before you sign any contractor proposals.

    Solar + Storage: The Finishing Layer

    Once your envelope is tight and your mechanical systems are electrified, solar panels become the logical capstone. At this point, you’ve reduced your energy demand as much as practically possible, and now you’re sizing a renewable generation system to meet that reduced demand. That’s the correct order of operations.

    The financial case for solar in 2026 is strong, particularly for homeowners who’ve completed earlier retrofit stages. According to Kukun’s 2026 analysis of energy-efficient upgrades, the combination of solar panels paired with battery storage now delivers a 137% ROI on resale for retrofit projects, while simultaneously cutting heating and cooling costs by up to 50%. Notably, appraisers are now applying the Income Capitalization Approach to energy savings—meaning that $3,600 in annual utility savings can be formally capitalized into a measurably higher property valuation, not just treated as a vague lifestyle benefit.

    That last point deserves emphasis. For a long time, the green premium on energy-efficient homes was real but hard to quantify in an appraisal context. That’s changing. AI-driven valuation models are increasingly incorporating energy performance data, which means the retrofit work you do today is more likely to be recognized in your home’s appraised value when you eventually sell.

    Battery storage adds another dimension to the math. Grid outages are more frequent and more prolonged than they were a decade ago in many regions. A battery paired with solar provides energy resilience that has genuine monetary value—both in avoided losses during outages and in the peace of mind it provides buyers, who increasingly factor that into what they’re willing to pay.

    Financing the Journey: You Don’t Have to Fund It All at Once

    One of the most liberating reframes for budget-conscious homeowners is recognizing that a net-zero retrofit is a journey, not an event. You don’t need to budget $150,000 up front. You need a sequenced plan and a financing strategy that matches your cash flow.

    Several options are worth exploring. Property Assessed Clean Energy (PACE) financing allows homeowners to fund upgrades through their property tax bill, with repayment tied to the property rather than the individual—meaning if you sell before it’s paid off, the obligation transfers to the new owner. This structure makes high-upfront-cost upgrades like solar and heat pumps more accessible.

    Federal tax credits for energy-efficient home improvements have also been expanded and extended in recent policy cycles. Depending on where you live, you may be eligible for credits on heat pump installation, insulation upgrades, energy audits, and solar equipment. These should be mapped out before you prioritize your retrofit sequence, since the credit availability on certain measures may influence timing.

    The Bottom Line: A Staged Approach Beats Paralysis

    The single biggest mistake you can make with a net-zero retrofit is waiting until you can do everything at once. The improvements you make today—even modest ones like attic air sealing and insulation—compound over time. Every year you delay, you’re paying for energy you could be saving.

    Start with an energy audit. Identify your three highest-priority envelope improvements. Shift your heating to a heat pump when your current system needs replacement. Layer in solar when your load profile is stable. Reassess incentives each year because the landscape shifts.

    Net-zero on a budget isn’t about cutting corners. It’s about sequencing smart, financing creatively, and letting compounding efficiency gains do the heavy lifting over time. The 2026 data makes one thing clear: the homeowners who start moving in this direction now are the ones who will look back in ten years and wonder why anyone waited.

    airtable_6a3ba080dce09-1

    How to Choose the Right Thermostat for Your Heating System (Furnace, Boiler, Heat Pump)

    Highlights:

    • Thermostat compatibility isn’t universal — mismatching your thermostat to your system type (furnace, boiler, or heat pump) actively hurts efficiency and can shorten equipment lifespan.
    • Heat pumps are the most sensitive to thermostat choice; the wrong device will trigger expensive auxiliary heat strips too early, silently inflating your energy bill.
    • Boiler/hydronic systems need thermostats with adaptive recovery or early-start logic — standard smart thermostat algorithms are tuned for forced-air behavior and can cause short-cycling on radiant systems.
    • Smart thermostats with demand-response/utility integration can deliver an additional 5–8% in savings on top of the standard 10–15% efficiency gain — but only if your thermostat is actually compatible with your system.
    • Always confirm C-wire availability, system staging (single, two-stage, variable-speed), and heat pump reversing valve (O/B) support before purchasing — and when in doubt, pay the $75–$150 for professional installation.

    Picking a thermostat sounds like the kind of decision you make in five minutes at the hardware store. Grab something off the shelf, match the wire colors, done. But if you’ve got a heat pump, a hydronic boiler, or a multi-stage furnace, the wrong thermostat doesn’t just underperform — it can actively fight against your system, waste energy, and shorten your equipment’s lifespan. Let’s slow down and do this right.

    Why Thermostat Compatibility Actually Matters in 2026

    Here’s something most homeowners don’t realize: thermostats aren’t universal. The device on your wall is essentially the brain of your entire heating system, and a mismatch between thermostat and equipment is one of the most common (and most preventable) causes of inefficiency.

    The numbers back this up. According to Market Data Forecast’s 2026 U.S. Smart Thermostat Market report, the U.S. smart thermostat market was valued at $1.21 billion in 2025 and is on track to hit $4.83 billion by 2034, growing at a compound annual rate of 16.6%. That’s not just people upgrading for the novelty. That’s a massive wave of homeowners recognizing that smarter thermostat control translates directly into lower utility bills and better comfort. The growth reflects real-world demand — people are feeling the pain of poorly matched or outdated thermostats and doing something about it.

    And the savings are tangible. Current industry studies indicate that the average household can save between 10% and 15% on heating and cooling costs annually with a smart thermostat — and in a typical home where HVAC expenses account for nearly half of the total energy bill, that compounds quickly. According to Climate Experts’ 2026 analysis of smart thermostat ROI, homeowners participating in demand-response programs — where the thermostat communicates with the local power grid to pre-heat or pre-cool during off-peak rate windows — often see an additional 5–8% reduction on top of that.

    Those savings assume your thermostat is actually compatible with your system. If it isn’t, you’re leaving money on the table — or worse, running your equipment in ways it wasn’t designed for.

    Furnace Systems: What You Need to Know First

    Gas and oil furnaces are the most forgiving when it comes to thermostat compatibility. Most residential furnaces run on standard 24-volt low-voltage wiring, which means the vast majority of smart thermostats on the market will work just fine.

    That said, “works” and “works optimally” aren’t the same thing.

    Single-stage furnaces cycle on at full capacity and cycle off. Simple. A basic programmable or entry-level smart thermostat handles this without any issues.

    Two-stage furnaces run at a lower capacity most of the time and ramp up to full power only when needed. For this setup, you want a thermostat that explicitly supports two-stage heating — otherwise it’ll default to treating your furnace like a single-stage unit, and you’ll lose the efficiency advantage that a two-stage system was designed to deliver.

    Variable-speed furnaces are the most sophisticated — and the most demanding on your thermostat. These systems modulate output across a wide range to maintain precise temperatures with minimal cycling. They need a compatible communicating thermostat, often a proprietary one from the same manufacturer (Carrier, Lennox, Daikin, Trane all have their own ecosystems). Before you buy any third-party smart thermostat for a variable-speed furnace, check the manufacturer’s compatibility tool or call your HVAC tech.

    One more thing: the C-wire (common wire) is a frequent sticking point. Older homes often don’t have one run to the thermostat location, and most smart thermostats need it to power themselves continuously. Solutions exist — power adapters, add-a-wire kits, or just running a new wire — but it’s worth knowing before you order.

    Boiler Systems: A Completely Different Animal

    Hydronic boilers are where homeowners most often get into trouble with thermostat selection, because radiant heat systems behave very differently from forced-air systems.

    A boiler circulates hot water through radiators or radiant floor tubing. The heat it delivers is slow, even, and deeply comfortable — but it takes time to respond. That fundamental characteristic changes how you should think about thermostat control.

    Standard smart thermostats aren’t always a great fit for boilers, especially if you’re running a multi-zone system with zone valves. Many smart thermostat algorithms are designed around forced-air behavior: quick response times, short heat cycles, aggressive setbacks. Applied to a boiler, that logic can cause short-cycling, temperature overshoot, and unnecessary wear on your circulator pumps.

    For single-zone boiler setups, a well-regarded smart thermostat like the ecobee or Nest can work — particularly if you configure the adaptive recovery settings to account for the slower response time of radiant heat. The key feature to look for is “early start” or “adaptive recovery” — the thermostat learns how long your system takes to reach the target temperature and begins heating early enough to hit it on time, rather than blasting heat to catch up.

    For multi-zone boiler systems, you’re generally better off with a thermostat built with hydronic systems in mind, or consulting with a professional about a proper zoning controller setup. Brands like Tekmar, Honeywell’s commercial line, and Caleffi make controllers specifically designed for hydronic applications.

    Floor-mounted radiant systems have an additional consideration: thermal lag. Radiant floors can take hours to reach equilibrium, so a thermostat that’s too reactive will constantly overshoot and undershoot. Programmable schedules work better here than aggressive setback strategies.

    Heat Pumps: Where Thermostat Choice Gets Critical

    Heat pumps are where compatibility issues hurt the most — and where the right thermostat makes the biggest difference.

    If you’ve recently switched to a heat pump (or you’re considering it, given that Energy.gov estimates 13 million natural gas homes would save money by making the switch), this section deserves your full attention.

    Heat pumps work differently from furnaces. Instead of generating heat through combustion, they extract heat from outdoor air and move it indoors. They’re most efficient when they maintain a steady, consistent temperature — the opposite of the aggressive setback-and-recovery cycles that save energy on a gas furnace.

    Here’s the critical piece: heat pumps have backup or auxiliary heat — usually electric resistance strips — that kick in when the outdoor temperature drops too low for the heat pump to operate efficiently on its own. This auxiliary heat is expensive. A thermostat that doesn’t understand heat pump behavior will trigger aux heat too early, too often, or unnecessarily — and your energy bill will reflect it.

    What you need is a thermostat with:

    • Dedicated heat pump wiring support (look for “O/B” reversing valve wire terminals)
    • Aux/emergency heat lockout settings — so you can configure the temperature threshold at which backup heat activates
    • Adaptive setpoint control — maintaining temperature with small, frequent adjustments rather than large swings that trigger aux heat

    For this reason, the best thermostat for your HVAC system depends heavily on what kind of system is behind the wall — especially with heat pumps, where a poorly chosen thermostat can quietly cost you hundreds of dollars a year without you ever knowing why.

    The ecobee Smart Thermostat Premium and the Google Nest Learning Thermostat (4th gen) are consistently the top picks for heat pump applications in 2026. Both understand heat pump logic natively, manage aux heat intelligently, and support multi-stage configurations. Nest gets the edge for households that prefer a more hands-off experience; ecobee shines for people who want granular control and room sensor integration.

    Multi-stage heat pumps (two-stage or variable-speed compressors) add another layer. Make sure your thermostat explicitly supports two-stage or variable-capacity heat pump operation — not just conventional two-stage heating. They’re different wiring configurations and different control logic.

    Smart Thermostat Features Worth Paying For (And Some That Aren’t)

    Once you’ve confirmed compatibility with your system type, the next question is which features actually move the needle on comfort and savings.

    Worth It:

    • Learning/auto-scheduling — Genuinely useful if your household has consistent patterns. The Nest’s learning algorithm and ecobee’s SmartSensor integration both do this well.
    • Geofencing — Uses your phone’s location to shift into energy-saving mode when you leave and recover to comfort settings before you return. Works best in single-occupant or highly consistent households.
    • Room sensors — ecobee’s approach of using remote sensors to detect occupancy and balance temperatures across rooms is one of the most underrated features in residential HVAC control.
    • Demand response / utility integration — If your utility offers time-of-use rates or a demand-response program, a compatible thermostat can automatically pre-condition your home during cheap rate windows and ease off during peak pricing. That’s the additional 5–8% savings noted earlier — real money over a full heating season.
    • System monitoring and alerts — Modern smart thermostats can detect unusual runtime patterns that signal a refrigerant issue, a dirty filter, or a failing component. Catching that early is worth more than the thermostat cost.

    Skip or Low Priority:

    • Voice control — Useful occasionally, but not a differentiator for heating performance.
    • Fancy displays — Nice, but not worth paying a significant premium over a more functional model.
    • Brand-specific ecosystem lock-in features — Unless you’re deeply committed to a single smart home ecosystem (Apple Home, Google Home, Amazon Alexa), prioritize Matter-certified thermostats that work across all of them.

    Installation: DIY or Call a Pro?

    For most standard furnace applications with an existing C-wire: DIY is entirely reasonable. The manufacturers have invested heavily in guided installation apps, and a straightforward swap takes under an hour.

    For heat pumps, boilers, multi-zone systems, or any setup where you’re not 100% certain about wire labeling and system type: call a pro. The cost of a professional installation (typically $75–$150) is trivial compared to the cost of a mis-wired thermostat causing your heat pump’s reversing valve to operate backwards — or your aux heat to run continuously because the lockout temperature was never configured.

    One thing worth checking before scheduling installation: photograph your existing thermostat wiring before disconnecting anything. Label each wire with painter’s tape. Thermostat wire colors are not always wired to their matching terminals, and old labels can be faded or nonexistent.

    The Bottom Line

    The thermostat market is growing fast because homeowners are finally recognizing that this small device has an outsized impact on energy costs, system health, and daily comfort. But the explosion of options has also made selection more confusing — especially when you’re trying to match a heat-pump-specific device to a system that requires O/B reversing valve support and aux heat lockout logic.

    Start with your system type. Confirm compatibility with your existing wiring. Then layer on the smart features that match your household patterns. That’s the sequence — and following it puts you in the category of homeowners actually capturing those 10–15% annual savings, rather than leaving them on the table.

    airtable_6a3ba07de7a60-1

    Choosing Durable, Low-Maintenance Materials for Small Kitchens (Cabinets, Countertops, and Floors)

    Highlights:

    • Nearly all homeowners (94%) find their countertops high-maintenance — the fix is choosing non-porous, seal-free materials like quartz or modern laminate from the start.
    • In a small kitchen, every surface is a working surface; prioritize wipe-clean finishes and scratch resistance over aesthetics alone.
    • Factory-painted MDF slab cabinets in a satin or semi-gloss finish offer the best balance of durability, humidity resistance, and easy cleaning for compact spaces.
    • LVP/LVT flooring is the market’s overwhelming choice for kitchens in 2026 — waterproof, scratch-resistant, comfortable underfoot, and backed by a $33B+ market reflecting broad consumer confidence.
    • Material choices don’t exist in isolation — countertops, cabinets, and floors work as a system, and aligning all three toward low-maintenance performance compounds the long-term payoff.

    Let’s be honest: a small kitchen doesn’t get a pass on wear and tear. If anything, it takes more abuse per square foot than a sprawling open-plan layout. Every splash, dropped pan, and daily ritual of cooking happens in a compressed space where surfaces can’t hide. That’s why material selection isn’t just a design decision — it’s a long-game strategy.

    If you’re deep in the planning phase, you’ve probably already looked at layout ideas, color palettes, and storage hacks. But the materials you choose for your cabinets, countertops, and floors will determine how your kitchen actually holds up five or ten years from now. And in 2026, the data is starting to paint a pretty clear picture of where the smart money is going.

    The Maintenance Problem Is Bigger Than You Think

    Here’s a stat that should stop you mid-Pinterest-scroll: a recent Formica study found that 94% of homeowners now describe their countertops as “high maintenance.” That’s not a niche complaint from a handful of renovation purists — that’s almost everyone. And when you’re dealing with a small kitchen where every surface is within arm’s reach and gets touched constantly, high-maintenance materials aren’t just inconvenient. They’re a slow burn of frustration.

    The takeaway here isn’t that all countertops are bad. It’s that most homeowners chose their materials without fully accounting for the upkeep required — and they’re paying for it daily. The good news? This widespread dissatisfaction is driving a significant shift in how people shop for kitchen surfaces in 2026. Younger homeowners especially are wising up fast. Gen Z buyers, in particular, are showing an openness to previously overlooked materials, with 86% saying they’d consider laminate countertops — compared to just 56% of Baby Boomers.

    That generational gap tells you everything about how the definition of “good taste” in kitchen materials is evolving. It’s less about prestige and more about practicality.

    Countertops: Durability Over Drama

    The countertop landscape in 2026 comes down to a few materials that genuinely deliver on the durability-plus-low-maintenance promise — and a few that look great in showrooms but underwhelm in real kitchens.

    Quartz

    Quartz remains the workhorse pick for good reason. It’s an engineered stone — meaning it combines crushed natural quartz with resins and pigments — which gives it two properties that small kitchen owners particularly value: it’s non-porous, so it doesn’t absorb stains, and it requires zero sealing. You wipe it down, and you’re done. Quartz continues to lead the pack in 2026 precisely because of this combination of durability and minimal upkeep, with matte and honed finishes becoming increasingly popular over high-gloss options.

    Porcelain

    Porcelain slabs are having a serious moment too, especially for smaller kitchens where a single countertop section can be covered by one continuous slab. Like quartz, porcelain is non-porous and stain-resistant. It also handles heat better than most engineered surfaces, which matters when you’re working with limited counter space and don’t always have room to set down a hot pan at a safe distance.

    Laminate

    Laminate — yes, really — deserves a serious reconsideration in 2026. The old stigma was built around the cheap, peeling laminate of decades past. Modern laminate is a different product entirely: high-pressure laminate with realistic stone and wood patterns, scratch resistance, and a price point that’s hard to argue with. For a small kitchen where you want to allocate budget toward cabinetry or appliances, laminate countertops give you a clean, low-maintenance surface that punches well above its weight.

    What you want to avoid in a small kitchen is anything that requires frequent resealing or careful handling. Natural marble, while stunning, is genuinely porous and prone to etching from acidic foods. If you’re cooking regularly in a tight space, that’s a material working against you.

    If you want to see how countertop material choices fit into the bigger picture of what’s driving small kitchen remodels right now, this 2026 small kitchen remodel trends guide breaks this down alongside layout strategies and finish choices that are dominating this year’s projects.

    Cabinets: The Surface You Touch Most

    Cabinets aren’t just storage — in a small kitchen, they’re the visual anchor of the entire room. And because you’re opening and closing them dozens of times a day, the finish and construction quality matter more than they might in a larger space where cabinet runs are a backdrop rather than the focal point.

    Thermofoil and High-Gloss Acrylic Cabinets

    Popular in compact kitchens, they photograph beautifully and are genuinely easy to clean — a damp cloth handles most messes. The trade-off is that thermofoil can peel around heat sources over time, and high-gloss acrylic shows every fingerprint. Worth considering if your kitchen gets heavy daily use.

    Painted Wood with a Quality Factory Finish

    Specifically MDF doors with a multi-step paint process, this gives you a smooth, wipeable surface that holds up to humidity better than solid wood. MDF doesn’t expand and contract with moisture changes the way solid wood does, which means you’re less likely to deal with cracking or warping paint over time.

    Slab-Style Cabinet Fronts

    Flat, handle-free doors have become especially popular in small kitchens for two reasons: they’re easier to clean (no crevices to trap grease) and they create a visual continuity that makes compact spaces feel larger. Pair them with integrated or recessed hardware to keep the lines clean.

    One thing to look for across all cabinet options is the finish rating. A good semi-gloss or satin finish is more durable than matte and far easier to clean without leaving marks. For hardware, stainless and brushed nickel hold up better than brass plating, which can wear through in high-touch areas.

    Floors: The Market Is Voting with Its Wallet

    The flooring category is where the 2026 data gets really interesting. The luxury vinyl tile (LVT) market is projected to reach $33.33 billion in 2026, up from $29.4 billion in 2025 — a compound annual growth rate of 13.4% — with the primary driver being homeowner demand for flooring that’s both durable and low-maintenance. That’s not a modest uptick. That’s a market reflecting a decisive consumer preference.

    And honestly, it makes complete sense. Luxury vinyl plank (LVP) and luxury vinyl tile (LVT) have improved dramatically in the past decade. The wear layers are thicker, the printing technology is convincingly realistic, and the locking systems are more stable. For a small kitchen specifically, LVP and LVT offer a combination of properties that’s hard to beat:

    • 100% waterproof core — critical for a kitchen where spills are daily occurrences
    • Scratch and dent resistance — especially important in tight spaces where you’re moving around with cookware constantly
    • Comfort underfoot — the slight give of vinyl is noticeably easier on your joints than tile during long cooking sessions
    • DIY-friendly installation — floating click-lock systems mean you can install without adhesives, and individual planks can be replaced if damaged

    Porcelain tile remains a strong contender, particularly for kitchens that get very heavy use or where you’re prioritizing longevity above all else. A well-installed porcelain floor can last decades. The downsides are the cold, hard surface and the grout lines — in a small kitchen, grout maintenance is an ongoing commitment. If you go the tile route, use larger format tiles with minimal grout lines, and invest in an epoxy grout that resists staining.

    Hardwood looks beautiful but is genuinely not the ideal choice for kitchens, especially small ones. Water damage from splashes and humidity cycles will eventually cause problems, and refinishing is a significant undertaking. Engineered hardwood offers better moisture resistance than solid hardwood, but it still can’t compete with LVP on waterproofing.

    The flooring market numbers are reflecting what practical homeowners already know intuitively: LVP and LVT have hit a quality threshold where they make the most sense for most kitchens, and the price-to-performance ratio is genuinely compelling.

    Putting It Together: The Small Kitchen Materials Stack

    If you’re optimizing a small kitchen for durability, low maintenance, and long-term value, here’s what the evidence points toward in 2026:

    • Countertops: Quartz for a premium, low-fuss surface; modern laminate if budget is a priority and you want to allocate spend elsewhere. Skip anything that needs regular sealing.
    • Cabinets: Factory-painted MDF in a slab profile with quality hardware. Easy to clean, visually streamlined, resistant to humidity-related warping.
    • Floors: LVP or LVT for the waterproofing, scratch resistance, and comfort — backed by a booming market that signals broad consumer confidence. Porcelain tile if longevity is the absolute priority and you’re committed to grout maintenance.

    The common thread across all three categories is this: in a small kitchen, every surface is a working surface. Choose materials that work with your daily life, not against it. The most beautiful countertop in the world isn’t serving you well if you’re conditioning it every six months or treating every splash like an emergency.

    Material choices are one piece of the puzzle, but they’re interconnected with layout decisions, lighting, and storage strategy.

    airtable_6a3ba07aacb28-1

    Soundproofing a Wall on a Budget: High-Impact, Low-Cost DIY Upgrades

    Highlights:

    • Sealing gaps (outlets, baseboards, ceiling edges) is the highest-impact, lowest-cost first step — sound behaves like water and flows through every opening before you’ve spent a dollar on panels or MLV.
    • Budget DIY wall soundproofing is genuinely viable: targeting a single problem wall with MLV, mineral wool, and acoustic caulk can realistically improve STC ratings by 8–15 points for $200–$600 in materials.
    • The four pillars — mass, decoupling, absorption, and sealing — don’t all require expensive professional work; budget builds can meaningfully address at least three of them without touching the wall structure.
    • Material sequencing matters more than material cost: premium panels applied over an unsealed wall will always underperform cheap materials applied in the right order.
    • Full structural isolation (double-stud walls, resilient channels) is the only reliable fix for heavy bass and professional audio needs — budget DIY has real limits, and knowing them saves you from wasting money.

    You don’t have to spend thousands of dollars to make a real dent in the noise coming through your walls. Whether it’s a neighbor’s bass-heavy playlist, traffic rumble, or a home office that desperately needs to stay private, there are smart, wallet-friendly upgrades you can pull off yourself. The trick is knowing which methods actually move the needle — and which ones just look good on paper.

    Let’s dig into what the 2026 data says, what your money actually buys you, and the techniques that give you the most acoustic bang for your buck.

    What Does Soundproofing a Wall Actually Cost in 2026?

    Before you start loading a cart with acoustic foam, it helps to understand the real price landscape — because “soundproofing” covers an enormous range of approaches and materials.

    According to HomeGuide’s 2026 cost breakdown, soundproofing a wall runs anywhere from $100 to $2,000 when you factor in professional labor, and acoustic wall panels for DIY projects come in at $2 to $17 per square foot for materials alone. That’s a staggeringly wide range, and it exists because the word “soundproofing” means wildly different things depending on what you’re trying to block and how deep you’re willing to go.

    On the lower end, you’re looking at surface-level treatments — sealing gaps, adding mass-loaded vinyl, layering in heavy curtains, or rearranging furniture to create natural sound barriers. On the higher end, you’re talking about structural work: pulling drywall, adding resilient channels, and building decoupled wall assemblies. For most homeowners working on a tight budget, the sweet spot lives firmly in that lower range.

    The key takeaway from that data: DIY acoustic panels are genuinely affordable. At $2 to $17 per square foot for materials, treating even a 100-square-foot wall doesn’t have to blow your budget if you’re strategic about it. Shop mid-range panels with a solid Noise Reduction Coefficient (NRC) rating, and you’re investing in real results — not just decoration.

    The Per-Square-Foot Reality Check

    Here’s where a lot of people get tripped up. They see a low material cost and underestimate what it takes to actually move the needle on noise transmission. The honest truth is that soundproofing is almost never a one-product fix.

    Soundproof Cow’s 2026 project cost analysis puts it plainly: while most soundproofing projects fall in the $4 to $30 per square foot range overall, the most frequently cited number for a mid-range residential project is $6 to $12 per square foot — with lower-budget jobs that target a single obvious weak point coming in well under that threshold.

    That’s a really useful frame for DIY planning. If you’re dealing with one loud shared wall in an apartment or bedroom, you’re not necessarily looking at a whole-room overhaul. You can realistically target that single problem surface, apply a layered treatment strategy, and land somewhere in the budget-friendly zone.

    What drives costs up? According to the same analysis, the factors that most reliably push projects into the higher range include ceiling work, structure-borne vibration, and layered assemblies. Standard airborne noise through a wall — the everyday voice/music/TV bleed — is much more forgiving. That’s exactly where budget DIY techniques shine.

    Why Cheap Doesn’t Mean Ineffective: The Layered Approach

    One of the biggest misconceptions in DIY soundproofing is that expensive materials equal better results. That’s partially true — denser, higher-mass materials do outperform lightweight foam. But the installation strategy matters just as much as the product itself.

    The four pillars of effective soundproofing are mass, decoupling, absorption, and sealing. Most budget projects can meaningfully address at least two or three of these without professional help or a dramatic renovation.

    Here’s a practical breakdown:

    Mass means adding density to the wall so sound waves have a harder time pushing through. You don’t always need specialty soundproof drywall (though it’s effective). A layer of mass-loaded vinyl (MLV) — which typically runs $2 to $5 per square foot — applied directly to the existing wall before a new drywall layer can add significant transmission loss at a fraction of the cost of demo-and-rebuild.

    Sealing is almost always the highest-impact, lowest-cost move. Sound behaves a lot like water — it finds every gap and flows right through. Electrical outlets on shared walls are notorious weak points. Outlet gasket inserts cost a few dollars for a pack. Acoustic caulk along baseboards and wall edges costs under $20 a tube. These fixes are boring, unglamorous, and remarkably effective.

    Absorption inside the wall cavity is where mineral wool insulation earns its reputation. If you’re already opening up a wall for any reason, swapping standard fiberglass batts for dense-pack mineral wool (like Rockwool Safe’n’Sound) typically costs $0.50 to $1.50 per square foot more — and the acoustic difference is measurable.

    Decoupling is the most advanced of the four and the hardest to DIY without some experience. It involves physically separating the drywall from the studs so vibration can’t transfer mechanically through the structure. Resilient channels and clips are the standard solution. It’s doable as a DIY project, but it’s where most budget builds start cutting corners that cost them results.

    The Budget DIY Toolkit: What to Buy First

    If you’re working with limited funds and want to sequence your upgrades intelligently, here’s a prioritized approach that matches the data:

    Start with the gaps

    Before buying a single panel or roll of MLV, go over the wall inch by inch. Electrical boxes, switch plates, HVAC vents, gaps at the ceiling and floor — every one of these is a sound highway. Acoustic caulk, foam gaskets, and weatherstripping are your first purchase.

    Add mass with MLV

    At $2 to $5 per square foot, mass-loaded vinyl is one of the most cost-effective wall treatments available. It can be applied directly to studs before drywall goes up, or layered over existing drywall and covered with a second sheet. It’s heavy, limp, and excellent at blocking mid-range and high-frequency airborne sound.

    Layer in absorption panels

    Acoustic panels on a finished wall reduce reverberation and make sound feel noticeably quieter inside the room. They’re not the same as blocking sound from passing through, but they’re a meaningful part of the overall picture — and at $2 to $17 per square foot for materials, they’re accessible. Focus placement on the wall closest to the noise source and at first-reflection points.

    Upgrade insulation opportunistically

    Any time you have a reason to open a wall — a renovation, a repair, a new outlet — fill the cavity with mineral wool. The marginal cost over standard insulation is small; the acoustic payoff is significant.

    For a detailed walkthrough of how to sequence and combine these methods into a full project plan — including guidance on STC ratings, material selection, and which upgrades work best for different noise types — the step-by-step DIY wall soundproofing guide is an excellent resource that covers the full process from diagnosis to finishing.

    The Materials That Actually Deliver

    Let’s get specific, because generic advice only goes so far.

    Mineral wool insulation (Rockwool/Roxul)

    Dense-pack mineral wool in a standard 2×4 wall cavity can push the wall’s STC rating up by 4 to 8 points depending on what else is in the assembly. It’s one of the highest-ROI upgrades available and widely stocked at home improvement stores.

    Mass-loaded vinyl

    MLV is dense, flexible, and cuts with scissors. It’s not pretty on its own, but sandwiched between drywall layers or hung as a behind-the-scenes barrier, it’s a workhorse. The 1-pound-per-square-foot version is the standard choice for residential walls.

    Green Glue compound

    This viscoelastic damping compound goes between two layers of drywall and converts sound energy into small amounts of heat. A two-tube pack covers a 4×8 sheet of drywall and typically runs $15 to $20. It’s not a magic bullet, but combined with a second drywall layer, it consistently delivers measurable improvement.

    Acoustic panels (fabric-wrapped)

    These are the most visible upgrade and the easiest to DIY. You can build your own with rigid fiberglass or mineral wool board (Owens Corning 703 is popular), basic lumber, and acoustically transparent fabric. Total material cost per panel: often under $30 for a 2×4 foot unit. Commercial alternatives run higher but offer better aesthetics and warranty coverage.

    Weatherstripping and door sweeps

    If sound is flanking around the door into the room, no amount of wall treatment will fix the problem. A door sweep and compression weatherstripping are an essential complement to wall work on any shared-wall project.

    How to Set Realistic Expectations

    This is where a lot of DIY soundproofing content falls short: it promises dramatic results without being honest about the physics.

    Budget DIY upgrades — sealing, MLV, added insulation, a second drywall layer with Green Glue — can realistically improve a wall’s STC rating by 8 to 15 points in favorable conditions. That’s a real and noticeable difference. Loud conversation on the other side becomes a murmur. Traffic noise drops from intrusive to background. That’s a quality-of-life win.

    What budget DIY cannot reliably do is achieve the deep isolation that a fully decoupled, double-stud wall assembly delivers. If you’re recording professional audio or need to block thunderous bass, the physics eventually demand structural solutions that go beyond surface treatments.

    But for the vast majority of residential noise problems — the neighbor’s TV, the street traffic, the thin walls of an older home — the layered budget approach works. The 2026 cost data confirms that the most effective residential projects aren’t necessarily the most expensive ones. Targeting the right weak points, using the right materials in the right order, and sealing before you layer: that formula consistently outperforms throwing money at premium materials without a strategy.

    Final Thoughts: Spend Smart, Not Big

    The data makes a compelling case for the budget DIY approach. When professional wall soundproofing can hit $2,000, and mid-range residential projects run $6 to $12 per square foot, the fact that you can achieve real results with $200 to $600 in materials and a weekend of work is genuinely exciting.

    The keys are sequencing your upgrades correctly, starting with air sealing before any mass or absorption treatment, and being honest about what level of isolation you actually need. A few hundred dollars spent on MLV, mineral wool, and proper sealing will outperform a few thousand spent haphazardly on premium panels applied over an unsealed wall.

    Start with the gaps. Add mass. Layer in absorption. Do it in that order, and you’ll be surprised what a meaningful difference a budget build can make.

    airtable_6a3ba077da6eb-1

    Measuring ROI on Free AI Marketing Tools: Metrics, Tracking, and Real Examples

    Key Takeaways:

    • Free AI tools still cost you time — always calculate hours invested alongside tool cost to get a true ROI picture.
    • Set a baseline before deploying any tool; without pre-AI numbers, you have no way to prove (or disprove) impact.
    • Focus on outcome-linked metrics like time-per-task, conversion rates, and cost per lead — not vanity metrics like impressions or follower counts.
    • AI-driven marketing consistently delivers measurable returns: a 35% average ROI improvement (McKinsey) and 31.2% e-commerce ROI gains (Salesforce) show the upside is real and documented.
    • Patience and isolation matter — give content tools 90–120 days to show SEO results, and avoid launching multiple changes at once so you can attribute wins accurately.

    When someone hands you a free tool that promises to transform your marketing, the first question shouldn’t be “how do I use it?” It should be “how do I know if it’s working?”

    That’s the gap most small businesses fall into. They grab a handful of free AI tools, start generating content or automating emails, and then… nothing. No before-and-after comparison. No tracking. No idea whether those tools are moving the needle or just making them feel productive.

    Measuring ROI on free AI marketing tools isn’t complicated, but it does require intention. Here’s how to do it right — with real data backing up why it matters.

    Why ROI Measurement Matters Even When the Tool Is Free

    “It’s free” doesn’t mean it’s costless. Every tool you add to your workflow costs you something: time to learn it, hours to implement it, mental bandwidth to manage it. If a free AI tool isn’t contributing to actual business outcomes, it’s a drain, not a benefit.

    The good news? The data strongly suggests that AI-powered marketing delivers real, measurable returns — as long as you’re tracking the right things. According to research compiled byn McKinsey Digital and aggregated by Searchlab, businesses using AI for marketing report an average ROI improvement of 35%, with the biggest efficiency gains in content production (63%), followed by ad optimization (41% lower cost per acquisition) and email marketing (28% higher open rates).

    That’s not a rounding error — that’s a structural advantage. And it’s available to small businesses using free tools, not just enterprise teams with six-figure software budgets.

    The catch? You only capture those gains if you’re measuring from the start.

    Set Your Baseline Before You Touch a Single Tool

    This is the step everyone skips, and it’s the one that makes or breaks your ROI story.

    Before deploying any AI tool — free or paid — document your current numbers. Pull data on:

    • Content output: How many blog posts, social captions, or emails does your team produce per week?
    • Time-per-task: How long does it take to write a 500-word post, design a social graphic, or draft an email sequence?
    • Engagement rates: What are your current open rates, click-through rates, and average session duration?
    • Lead metrics: What’s your current cost per lead, and how many leads are you generating per channel per month?
    • Conversion rates: What percentage of leads convert to customers?

    These become your control group. Every number you track after introducing an AI tool gets measured against this baseline. Without it, you’re just guessing.

    A simple spreadsheet works fine. Create a column for “pre-AI” and a column for “post-AI (Month 1),” “post-AI (Month 3),” and so on. You want to see trend lines, not just snapshots.

    The Metrics That Actually Tell You Something

    Not every metric is worth tracking. Vanity metrics (impressions, follower counts, raw traffic) feel good but rarely connect to business outcomes. When measuring the ROI of free AI tools, focus on metrics that tie to time or money.

    For Content Tools (ChatGPT, Canva, Google Gemini):

    • Time to first draft — before vs. after
    • Content output volume — posts per week
    • Organic traffic growth attributed to AI-assisted content
    • Engagement rate on AI-assisted vs. manually created posts

    For Email Tools (Mailchimp AI, Brevo):

    • Open rate and click-through rate changes
    • Revenue per email sent (if you’re e-commerce)
    • Time spent building and sending campaigns

    For SEO and Analytics Tools (Google Analytics 4, Search Console):

    • Keyword rankings for AI-optimized content
    • Bounce rate and time-on-page improvements
    • Organic session growth month-over-month

    For Social Media Tools (Buffer AI, Meta AI Features):

    • Engagement rate per post
    • Reach growth
    • Time saved on scheduling and caption writing

    The formula for ROI here is straightforward: (Value Generated − Cost of Time Invested) / Cost of Time Invested × 100. For free tools, the “cost” is mostly your team’s hours. Assign an hourly rate to that time and run the math.

    Real Example: Content Volume and Organic Traffic

    Let’s walk through what this actually looks like in practice.

    Say you’re a small e-commerce brand running a two-person marketing team. Before introducing AI writing tools, you publish two blog posts per month. Each takes about four hours to research and write — eight hours total.

    After three months of using a free AI assistant for first drafts, you’re publishing six posts per month and each takes about 90 minutes to refine. That’s nine hours for three times the output. Your time cost dropped from eight hours to nine while tripling volume.

    Three months later, organic traffic is up 40% and you’ve seen a 15% uptick in email sign-ups from blog readers. Neither of those results would show up in your data without the baseline.

    This is the kind of story that justifies expanding tool usage — or, if the numbers don’t pan out, pivoting away from a tool that isn’t delivering.

    The Data Behind AI-Driven Personalization ROI

    One of the most compelling 2026 data points for understanding what’s possible with AI marketing comes from the Salesforce Commerce Cloud Personalization Benchmark Study. After analyzing over 1.2 billion e-commerce sessions across nearly 4,800 retail brands, the study found that AI-driven personalization lifted average order values by 26.4%, reduced cart abandonment by nearly 20%, and improved overall e-commerce ROI by an average of 31.2%. Brands using real-time machine learning recommendation engines outperformed those relying on rules-based personalization by more than double on revenue-per-visitor metrics.

    Now, most of those brands in the study were mid-market and enterprise players with paid personalization stacks. But the principle translates directly to small businesses using free AI tools.

    Free email platforms with basic AI segmentation, free chatbot tools that personalize responses, and even Google Analytics 4’s predictive audiences all leverage the same underlying logic: show the right person the right thing at the right time. The magnitude of the ROI improvement may be smaller for a boutique with 2,000 customers than for a retailer with 2 million, but the direction is the same.

    If you’re a small business owner who hasn’t explored what’s available in the free tier, it’s worth checking out a curated list of no-cost AI solutions built specifically for small business marketing before building your measurement framework. Knowing which free tools are in your arsenal helps you plan your tracking accordingly — because different tools require different KPIs.

    Building a Simple Tracking Dashboard

    You don’t need a BI tool or a data analyst. A well-structured Google Sheet will do the job for most small businesses.

    Here’s a simple structure:

    Metric

    Pre-AI Baseline

    Month 1

    Month 3

    Month 6

    Blog posts/month

    2

    4

    6

    8

    Hours/post

    4 hrs

    2 hrs

    1.5 hrs

    1.5 hrs

    Organic sessions

    1,200

    1,400

    1,800

    2,400

    Email open rate

    21%

    23%

    26%

    28%

    Email CTR

    2.1%

    2.4%

    3.1%

    3.5%

    Leads/month

    18

    21

    27

    34

    Review this monthly and annotate any major changes (new tool added, campaign launched, seasonal shift). Over six months, you’ll have a clear before-and-after picture that you can actually show a boss, partner, or investor.

    Common Mistakes That Skew Your ROI Numbers

    A few things will throw off your measurement if you’re not careful:

    Attribution Creep

    Your organic traffic went up — but was it the AI content, the new backlink you got, or a seasonal surge? Isolate variables as much as possible. If you’re launching AI tools and a major PR push at the same time, you can’t cleanly separate the two.

    Measuring Too Early

    Content SEO, in particular, takes 90–120 days to show organic traction. Don’t pull the plug on an AI content tool after three weeks because you’re not seeing traffic lifts.

    Ignoring Time Savings

    Free tools have no hard dollar cost, so people forget to account for time. If an AI tool saves your team five hours per week and you value that time at $30/hour, that’s $600/month in recaptured productivity — real ROI, even if it doesn’t show up in revenue.

    Not Testing Alternatives

    Run simple A/B tests where you can. AI-written email subject lines vs. manually written ones. AI-generated social captions vs. written from scratch. Let the data pick the winner, not your gut.

    The Bottom Line: Measurement Is the Multiplier

    Free AI tools can genuinely move the needle for small business marketing. The data from both the McKinsey-aggregated benchmarks and the Salesforce personalization study point to the same conclusion: AI applied well to marketing consistently improves output quality, speeds up execution, and drives ROI improvements that range from modest to substantial.

    But “applied well” is the key phrase. That means tracking your baseline, monitoring the right metrics, being patient enough to let results develop, and being honest about what the numbers actually show.

    The businesses that will get the most from free AI tools in 2026 aren’t necessarily the ones with the most sophisticated stacks — they’re the ones that measure relentlessly, iterate quickly, and tie every tool back to a business outcome.

    Start there, and the ROI almost takes care of itself.

    airtable_6a3ba073a5f17-1

    How to Design a Small Shady Yard with Native Plants: Layouts, Layering, and Low-Maintenance Paths

    Highlights:

    • Native plants now appear in ~60% of new landscape designs and use 50–75% less water than turfgrass, making them the practical backbone of any low-maintenance shady yard.
    • Not all shade is equal — mapping your yard’s actual sun hours (full shade vs. dappled light vs. part shade) before planting is the single most important first step.
    • Layering like a forest (canopy → shrubs → perennials → ground cover) creates visual depth and a self-sustaining ecosystem, even in a very small space.
    • Path material makes or breaks a shaded garden — stepping stones with native ground cover fill and shredded bark paths are the most forgiving and naturalistic choices.
    • Native plantings cut pesticide use by roughly 80% and largely maintain themselves by year two or three, making “low maintenance” a realistic promise, not a marketing claim.

    If you’ve got a small yard that barely gets a sliver of sun, you’ve probably wrestled with that familiar mix of guilt and frustration — the patchy lawn, the scraggly hostas that never seem happy, the gravel path that felt like a good idea at the time. Here’s the thing: a shady yard isn’t a problem to solve. It’s a design opportunity to embrace, especially when you bring native plants into the picture.

    The good news? Gardeners and landscapers are catching on in a big way. The data backs this up, and we’ll dig into two telling statistics in a moment. But first, let’s talk about how to actually approach a small shaded space — the layouts that work, how to layer plants like a pro, and how to build paths that look good and stay that way without constant fussing.

    Why Native Plants Are the Smart Choice for Shade

    Before we get into layout and design, let’s settle one question: why native plants specifically?

    The short answer is that native plants evolved to thrive in your conditions — including low light, specific soil types, and local rainfall patterns. They don’t need coaxing, overwatering, or a cocktail of fertilizers to look decent. They just grow.

    The longer answer involves some compelling numbers. According to a 2026 landscaping statistics roundup from Gitnux, native plants now appear in roughly 60% of new landscape designs, a figure that reflects a genuine shift in how homeowners and designers are thinking about outdoor spaces. That’s not a niche trend anymore — it’s becoming standard practice.

    And there’s a very practical reason for that momentum: native plants consume anywhere from 50 to 75% less water compared to conventional turfgrass. In a shady yard where moisture can already be unpredictable — pooling in some spots, surprisingly dry in others depending on root competition — that kind of efficiency matters a lot. You’re not fighting against the conditions; you’re working with them.

    This is exactly why shade-adapted native species like wild ginger (Asarum canadense), native ferns, Virginia bluebells, and foamflower (Tiarella cordifolia) have become go-to choices for designers working with light-limited spaces. They were built for this.

    Reading Your Shade Before You Plant Anything

    One of the most common mistakes people make with shady yards is treating all shade as the same. It isn’t. There’s a real difference between:

    • Full shade (less than 3 hours of direct sun per day) — think areas directly under a dense tree canopy or between close buildings
    • Part shade / dappled light (3–6 hours, often filtered) — the sweet spot for the widest variety of native understory plants
    • Deep shade — essentially no direct sun, where even shade-tolerant plants can struggle

    Spend a full day in your yard before you commit to a planting plan. Walk through at 8am, noon, and 4pm and note where light actually lands. You’ll probably find more variation than you expect, and that variation can shape your entire layout strategy.

    Designing the Layout: Working With, Not Against, the Space

    Small yards require a slightly different approach than large ones. You can’t rely on sheer plant volume to create visual impact, so structure and intentional layers do the heavy lifting.

    A few layout principles that work especially well in small, shaded spaces:

    Create a Clear Focal Point

    In a limited space, one strong anchor — a beautifully shaped native shrub like a dwarf serviceberry (Amelanchier alnifolia), or a cluster of tall native ferns — gives the eye somewhere to rest. Without it, small yards can feel chaotic.

    Use the Edges, Not the Center

    Resist the urge to plop plants in the middle of the space. In a small shady yard, planting densely along the perimeter creates depth and makes the yard feel larger. It also mimics how plants naturally grow at the edge of a woodland — which is exactly the habitat you’re recreating.

    Don’t Underestimate Ground Cover

    The floor of your design matters just as much as the vertical elements. Native ground covers like creeping phlox, wild strawberry, or pachysandra alternatives (Allegheny spurge is a beautiful native option) tie everything together and suppress weeds without a lot of intervention.

    The Layering Approach: Thinking Like a Forest

    Natural forests don’t have neat, single-level plantings. They stack — canopy trees, understory trees, shrubs, herbaceous plants, ground covers, and mosses all exist in different vertical zones. You can absolutely replicate this layering approach in a small yard, scaled down to suit the space.

    Here’s a simplified version for a small shady residential yard:

    Layer 1 — Canopy (If Applicable): 

    If you already have a mature tree (oak, maple, birch), it’s doing this job for you. Don’t fight it; work under it.

    Layer 2 — Understory / Mid-Level Shrubs:

    Native options like native azaleas, spicebush (Lindera benzoin), or itea (Itea virginica, which absolutely glows with fall color) fill this zone beautifully. Keep height in proportion to your fence or house — in a small yard, a 6-foot shrub can quickly feel like a wall.

    Layer 3 — Herbaceous Perennials:

    This is where you get to have fun with texture and seasonal color. Native bleeding heart, wild columbine (Aquilegia canadensis), and black cohosh are all strong performers in shade. They die back in winter, which is fine — that’s part of the seasonal rhythm that makes a native garden feel alive rather than static.

    Layer 4 — Ground Cover and Moss:

    Let native mosses establish where they want to — they’re an ecological asset, not a sign of neglect. Supplement with low creeping natives where you want more coverage.

    If you want a deep-dive into which specific plants perform best in humid, shady conditions, this guide to shade-adapted native plants for humid climates is exactly the kind of plant-level detail that takes your design from concept to reality. It covers species selection, bloom times, and layering companions that actually work together — an essential read before finalizing your plant list.

    Low-Maintenance Paths: Materials That Actually Belong in a Shaded Garden

    Paths in a shaded yard have to deal with a few extra challenges: moss growth, occasional dampness, leaf accumulation, and lower visibility. The wrong material becomes a slippery, high-maintenance headache. The right one practically takes care of itself.

    Decomposed Granite and Gravel:

    Works well in drier shade zones and has a naturalistic look that pairs beautifully with native plantings. The downside is that leaves can mix in and create a matted mess if you’re under a heavy canopy.

    Stepping Stones With Ground Cover Between:

    One of the best options for small shaded yards. Use irregular flagstone or large stepping stones, and let low native ground cover (or moss) fill the gaps. This approach is permeable, soft-looking, and feels completely at home in a woodland-style garden.

    Shredded Bark or Wood Chip Paths:

    Highly recommended for deeply shaded areas. It’s soft underfoot, biodegrades over time (adding organic matter to soil), suppresses weeds, and looks like it belongs in the environment you’re creating. Replenish every year or two, and you’re done.

    What to Avoid:

    Smooth concrete and polished stone become genuinely dangerous when wet and shaded. If you must use hardscape, choose textured or tumbled surfaces.

    Keep paths curving rather than straight. A curved path through a small space creates a sense of journey and makes the yard feel bigger than it is.

    The Maintenance Reality (It’s Better Than You Think)

    Here’s the honest pitch for native plant landscaping: the first year asks something of you. You’ll water while plants establish, pull weeds before ground covers fill in, and maybe rethink a placement or two. But by year two or three, something shifts.

    Around 67% of homeowners now express a preference for native plants in their landscapes — and based on industry satisfaction data, it’s not hard to see why. Once established, native plants largely look after themselves. No deadheading required for most, no fungicide sprays, no aggressive fertilizer schedules. The layered structure you’ve built creates its own leaf litter mulch over time, which feeds the soil and suppresses weeds. The plants, in short, start doing the maintenance for you.

    Native landscaping has also been shown to cut pesticide use by roughly 80% compared to conventional approaches — a statistic that should resonate with anyone who’s ever reluctantly reached for a spray bottle in a yard where kids or pets are playing.

    This is what “low maintenance” actually means in a native garden: not no work, but less work in all the right places.

    Putting It All Together: A Simple Small-Yard Design Checklist

    Before you order a single plant, run through this:

    1. Map your shade zones — document actual sun hours across different spots in the yard.
    2. Identify your soil — shaded yards often have compacted soil or heavy root competition. Amend with compost before planting.
    3. Pick your path material — decide early, because paths define the structure everything else grows around.
    4. Choose your anchor plant — one dominant shrub or fern mass that gives the design its backbone.
    5. Layer in threes — think shrub layer, perennial layer, ground cover layer. Even in a tiny space, this depth is what makes the design feel intentional.
    6. Allow for moss — seriously, stop treating it as a problem. It’s a native ground cover that costs you nothing.
    7. Plant in odd-numbered groupings — threes and fives of the same plant look natural; single specimens of everything looks like a collection, not a garden.

    A small shady yard is, in many ways, easier to get right than a large sunny one. The plant palette is focused, the design principles are clear, and once native plants get established, the garden starts to run itself. What once felt like a landscaping liability has a way of becoming the most distinctive — and most beloved — corner of your property.

    airtable_6a3ba07106a16-1

    The Solo Business Tech Stack in 2026: Tools That Save Time and Scale Revenue

    Highlights:

    • The modern solo tech stack costs $3,000–$12,000/year — a 95–98% reduction compared to traditional staffing, making high-margin solo businesses genuinely viable at scale.
    • Automation should be the first layer of any solo stack because it eliminates recurring tasks entirely, rather than just making you faster at them.
    • AI adoption among small businesses crossed 58% in 2025 — solo operators who build AI into their workflows are outpacing both peers and small teams on output and margin.
    • Solo operators running optimized stacks can achieve 60–80% operating margins — a figure that’s structurally out of reach for traditionally staffed businesses.
    • Start with four tools max (automation, AI writing, payments, scheduling), then add deliberately as revenue grows — tool sprawl is the most common and most avoidable mistake.

    Running a business by yourself used to mean doing everything the hard way. You were the strategist, the marketer, the customer support rep, the bookkeeper, and the creative director — all before lunch. That’s still true in 2026, but the workload looks completely different. The right set of tools can now compress what used to take a team of five into a focused morning workflow. And the data backs this up in ways that are genuinely hard to ignore.

    This isn’t a list of the shiniest apps on Product Hunt. It’s a grounded breakdown of the tech categories that actually move the needle for solo operators — and why the economics of running lean have never been more favorable.

    The Numbers That Reframe Everything

    Let’s start with the stat that should reset your entire mental model of what’s possible alone.

    According to research compiled by AutoFaceless, the modern solopreneur tech stack runs between $3,000 and $12,000 per year — a reduction of 95 to 98 percent compared to what traditional staffing models would cost for the same output. Read that again. A solo operator today can run a full business for roughly what a single part-time hire used to cost in overhead alone.

    That number isn’t just impressive — it’s structurally significant. It means the barrier between “idea” and “operating business” is lower than it has ever been. And it explains why over three-quarters of solopreneurs hit profitability within their first year, and roughly one in five earns between $100,000 and $300,000 annually without bringing on a single employee.

    The second data point worth anchoring to comes from Entrepreneur Loop: by 2025, more than half of small businesses had adopted AI tools as a regular part of their operations — up sharply from about 40 percent the year before. That’s not a slow adoption curve. That’s a tipping point. And it maps directly onto what’s happening with solo operators who are building leaner, faster, and more profitably than their larger competitors.

    The viability question — can one person actually run a real business in 2026? — gets a thorough answer when you look at the broader context of how one-person businesses are performing across the economy. The short version: yes, and the structural tailwinds are stronger than they’ve ever been.

    The Foundation Layer: Automation First, Always

    If you’re building a solo tech stack from scratch, start with automation — not productivity apps, not communication tools, not even AI assistants. Automation.

    The reason is simple: automation compounds. A workflow you set up once runs while you sleep, travel, or work on something else. Productivity tools just make you faster at manual tasks. Automation eliminates the task entirely.

    The workhorses here are Zapier and Make (formerly Integromat). Zapier connects over 5,000 apps with point-and-click logic, making it the right starting point for most operators. Make handles more complex, branching workflows and tends to be more cost-efficient at scale. For solo founders comfortable with a little technical setup, n8n offers an open-source alternative with full control over your data.

    Practical uses: auto-routing new leads from your contact form into your CRM and triggering a welcome email sequence. Auto-tagging customer support emails by topic. Syncing invoice payments to a spreadsheet. Posting to social channels on a schedule without touching a single button. None of these require a VA. They just require a one-time build.

    AI Tools: Where the Real Leverage Lives

    The AI adoption numbers above aren’t a coincidence. Solo operators who integrated AI workflows early are now running circles around solo operators who are still doing things manually — and, increasingly, around small teams, too.

    The key insight is to think of AI not as a chatbot you ask questions, but as a department you delegate to.

    For Writing and Content

    Tools like Claude, ChatGPT, and Gemini handle first drafts, email templates, proposal outlines, SEO content, and social copy. The output quality has matured to the point where the editing pass is often shorter than the original write would have been.

    For Design

    Canva’s AI features, Adobe Firefly, and Midjourney cover the visual workload that used to require a freelance designer on retainer. Logos, social graphics, pitch deck visuals, ad creatives — one person can produce professional-grade assets in an afternoon.

    For Coding

    Even non-technical founders are shipping functional tools, landing pages, and internal dashboards using Cursor or GitHub Copilot. Describe what you want in plain language, and the AI writes the code. This is why solo founders are now building and launching Micro-SaaS products in four to twelve weeks — businesses that often generate anywhere from $50,000 to $3 million annually.

    The point isn’t to use every AI tool available. It’s to identify the two or three tasks in your week that eat the most time and find the AI that handles them well.

    Operations Stack: The Invisible Engine

    The operational layer is the unsexy part of the tech stack, but it’s what keeps a solo business running without burning out the person running it.

    CRM

    HubSpot’s free tier is genuinely good for solo operators managing under a few hundred contacts. For service businesses, Notion or Airtable configured as a lightweight CRM works well without the overhead of enterprise software.

    Payments and Invoicing

    Stripe is the default for product and SaaS-based businesses. For service providers sending invoices, HoneyBook or Dubsado handle contracts, proposals, and payment collection in one place — eliminating the back-and-forth that eats hours every month.

    Scheduling

    Calendly or Cal.com handle booking without the email tennis. Connect it to your calendar, set your availability, and let clients self-book. This alone reclaims several hours a week for most service-based solo operators.

    Project Management

    Notion and Linear are the two ends of the flexibility spectrum. Notion gives you a customizable workspace that handles notes, projects, and documentation. Linear is purpose-built for software development workflows and preferred by technical solo founders.

    None of these are glamorous. All of them are essential.

    Marketing Stack: Compound Visibility Over Time

    The goal with solo marketing isn’t to do more — it’s to build systems that keep working after you stop pushing.

    Email Marketing

    This remains the highest-ROI channel for solo operators. ConvertKit (now rebranded as Kit) is purpose-built for creators and solo businesses, with automation sequences that nurture leads over time without requiring daily attention. Beehiiv is gaining ground for operators building newsletter-based businesses.

    SEO and Content

    A combination of Ahrefs or Semrush for keyword research and Surfer SEO for on-page optimization gives solo operators a content strategy that generates organic traffic on autopilot. Pair this with consistent publishing and the compounding returns are significant.

    Social Scheduling

    Buffer and Hypefury handle cross-platform scheduling. The key for solo operators is batch-creating content in one sitting rather than logging in daily — a practice that cuts social media time from hours to thirty minutes a week.

    The trap to avoid: spreading across every platform. Pick the one or two channels where your customers actually spend time and go deep before going wide.

    The Financial Reality of Building Solo

    Here’s what ties all of this together. A well-assembled solo tech stack in 2026 doesn’t just save time — it fundamentally changes the economics of what you’re building.

    The operating margins available to well-tooled solopreneurs — roughly 60 to 80 percent — are simply not achievable for traditionally staffed businesses, which typically run margins between 10 and 20 percent. That margin difference is compounding capital you can reinvest in growth, rather than payroll.

    As of early 2026, more than a third of seven-figure businesses are run by solopreneurs who replaced traditional hires with AI-powered workflows. These aren’t scrappy side projects. These are real, scaled businesses generating real revenue — built on the principle that leverage beats headcount.

    The economics work. The tools exist. The only thing that doesn’t scale automatically is judgment — knowing which tools to actually use, which workflows to build first, and where to spend your attention when everything feels urgent. That part is still on you.

    But at least the rest of it doesn’t have to be.

    Building Your Stack: A Starting Framework

    If you’re assembling or refining your stack right now, here’s a practical starting point:

    Tier 1 — Start Here (Month 1):

    • One automation tool (Zapier or Make)
    • One AI writing assistant (Claude or ChatGPT)
    • One payment/invoicing tool (Stripe or HoneyBook)
    • One scheduling tool (Calendly)

    Tier 2 — Add When Revenue Supports It (Month 3–6):

    • Email marketing platform (Kit or Beehiiv)
    • CRM (HubSpot free tier or Notion-based)
    • Design tool (Canva Pro)
    • SEO tool (Ahrefs or Semrush)

    Tier 3 — Scale Layer (Once You’re Consistent):

    • AI coding assistant (Cursor or Copilot)
    • Advanced automation (n8n or Make multi-step)
    • Analytics (Fathom or Plausible for privacy-first tracking)

    The biggest mistake solo operators make isn’t picking the wrong tool — it’s picking too many tools too early and spending more time managing integrations than running the business. Start minimal. Add intentionally.

    The ceiling for what one person can build has moved dramatically. The stack is the reason why.

    Closing Thoughts

    The solo business model isn’t a workaround anymore — it’s a deliberate strategy. And in 2026, the tech stack is what separates solo operators who feel constantly behind from those who feel genuinely in control.

    You don’t need every tool on this list. You need the right tools for your specific business, wired together with enough automation that the routine stuff runs without you. Build that foundation, stay selective, and the compounding effect does the rest.

    The opportunity is real. The infrastructure is ready. Now it’s just execution.